Pete Lightning Bug, 2013 (commonly mistaken for cockroach) Found cardboard and paper, steel nuts & bolts, watercolor, white glue
part of the series:
"Insect Family"
carton


Pete Lightning Bug, 2013 (commonly mistaken for cockroach) Found cardboard and paper, steel nuts & bolts, watercolor, white glue
part of the series:
"Insect Family"
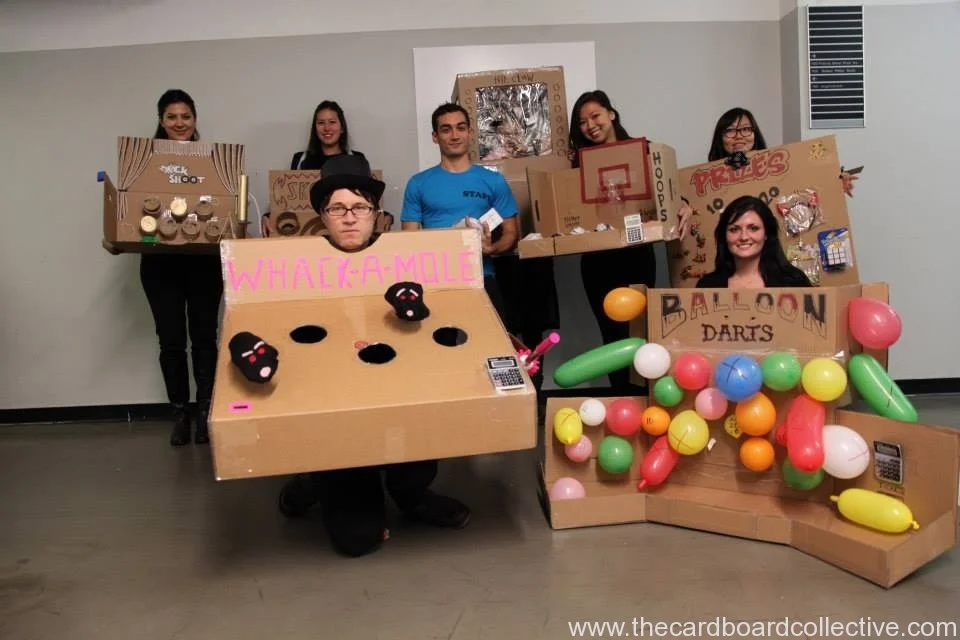
Cardboard Players Photo by Janet Chiang
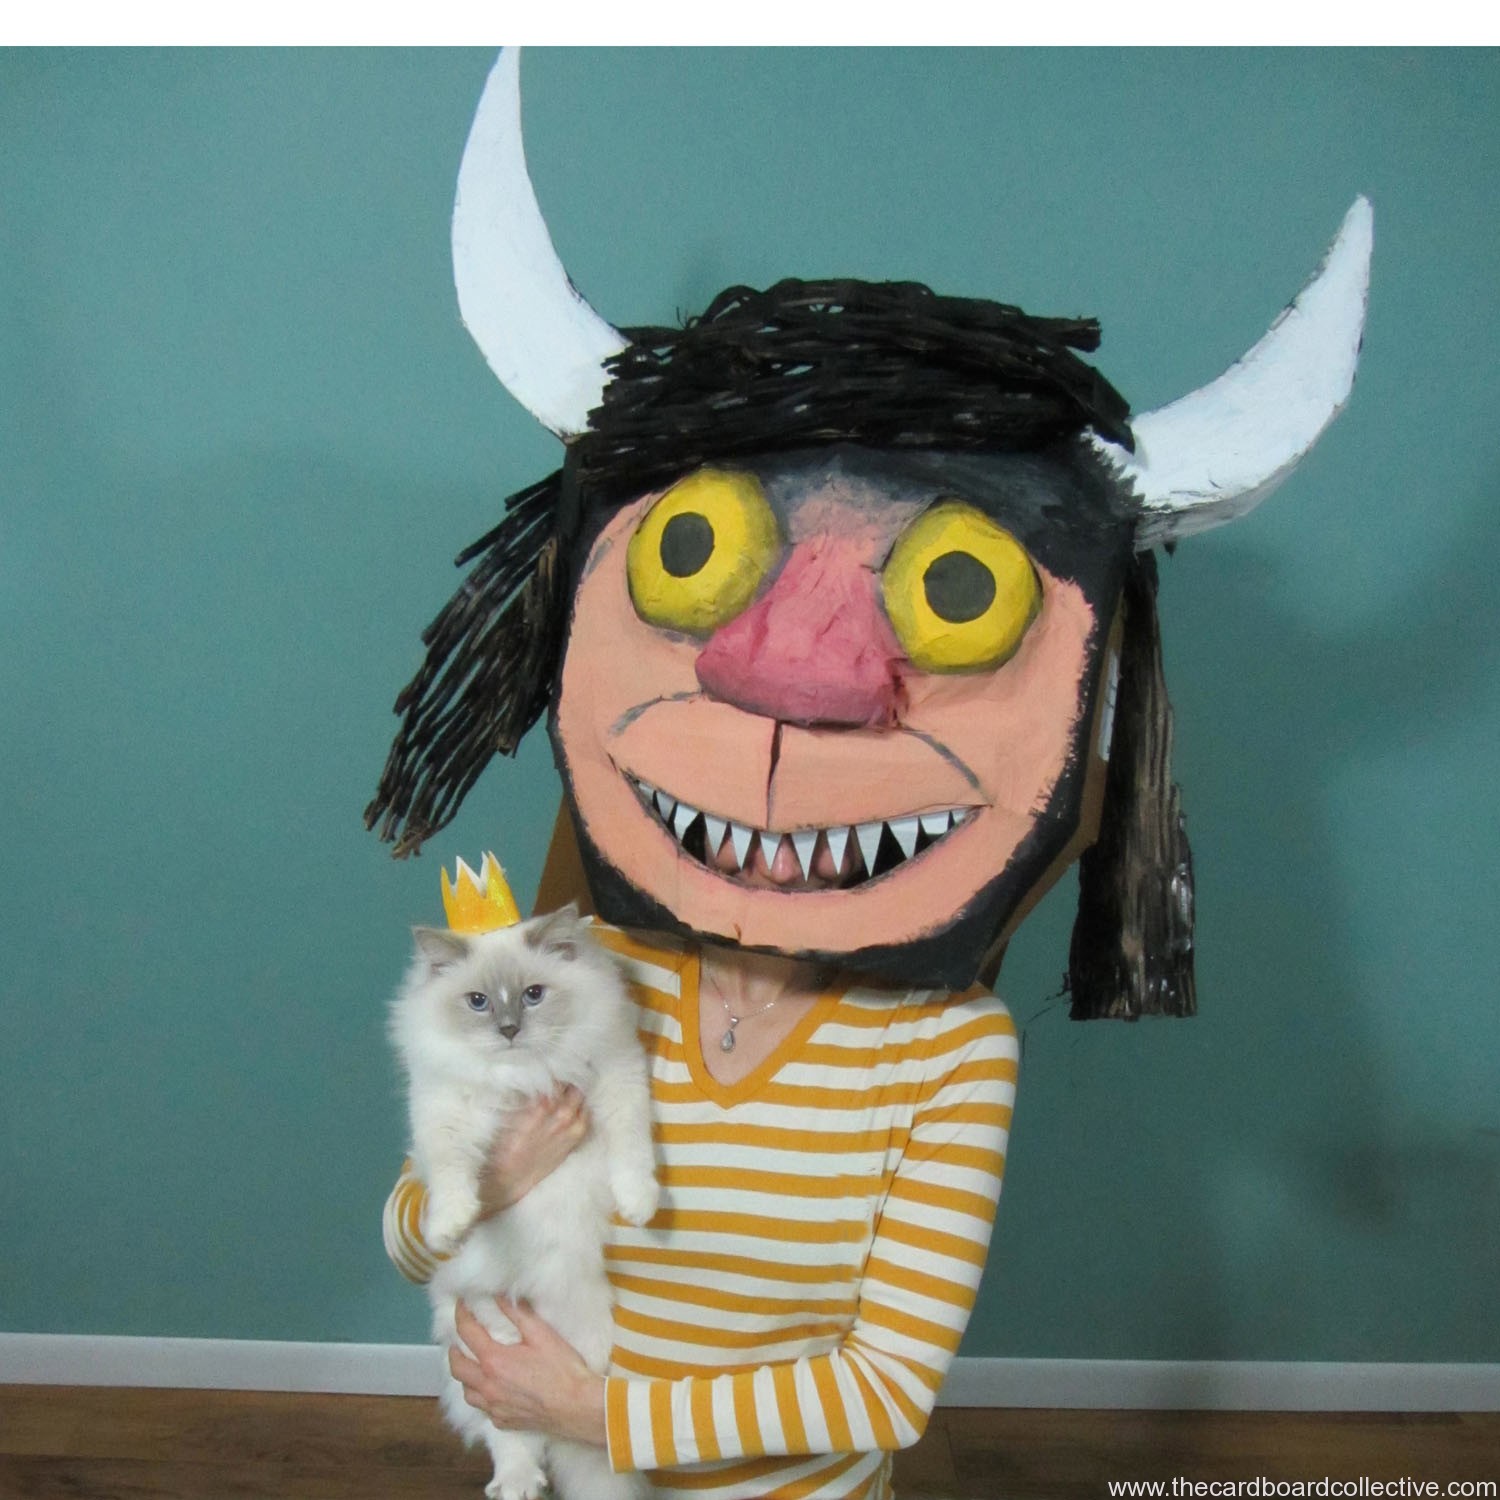
Where the wild things are cardboard mask by Tara Middleton

Wall E by Jennifer Kent
A few spectacular cardboard costumes sent in, and don't forget to check out the Flickr pool if you haven't already!

Amber Rainbow Locust, 2013 Found cardboard, melon cartons, watercolor, chalk pastel, white glue
Welcome!
.....to a tiny cardboard costume exhibition of our costumes called:
"Insect Family"
Stay tuned for more winged cardboard creatures.....


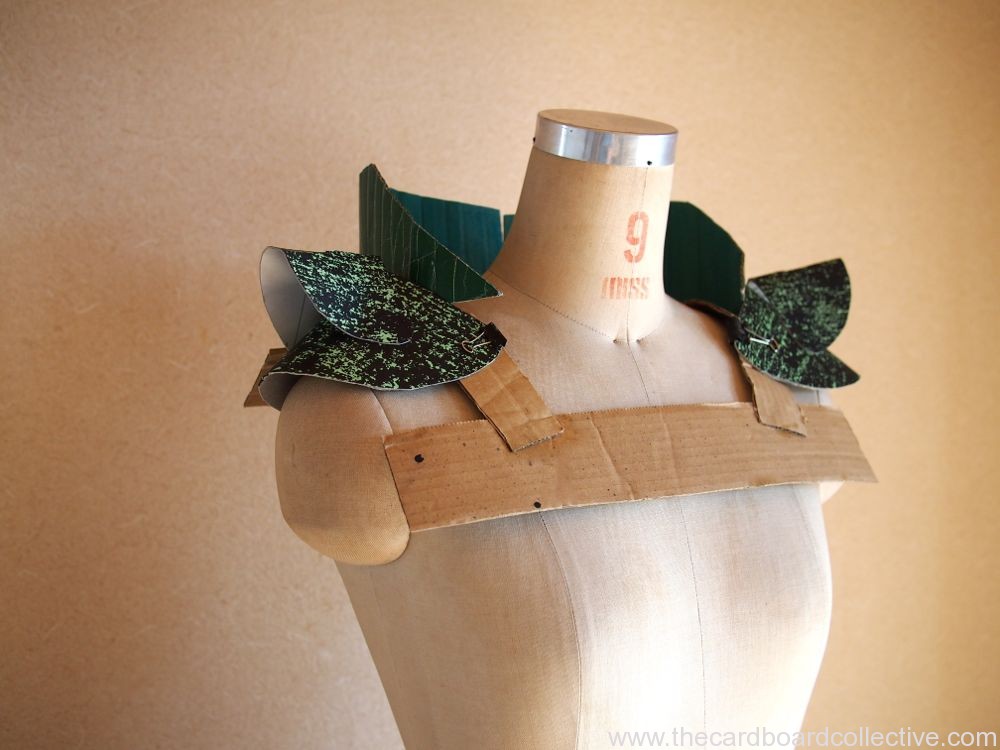
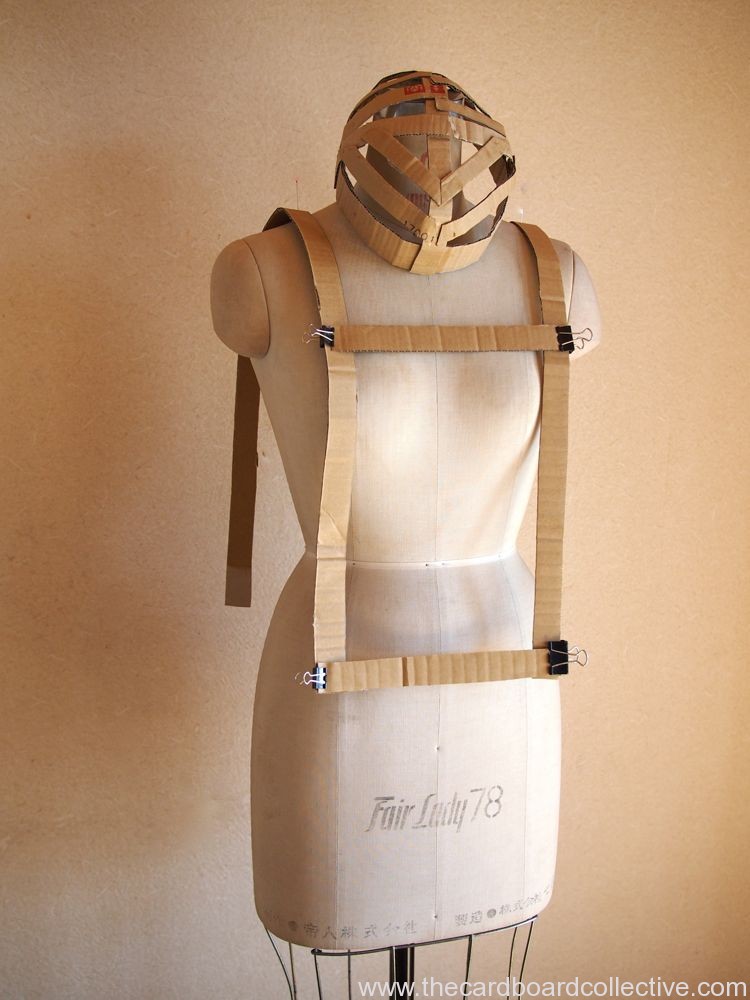
In case you are just starting your costume, (like me) I wanted to show you that you can still get started with a cool cardboard costume and finish before Halloween (you will have to hustle). Although I'm going as a grasshopper, most elements are the same, I'll just be dealing with extra legs and antennae...
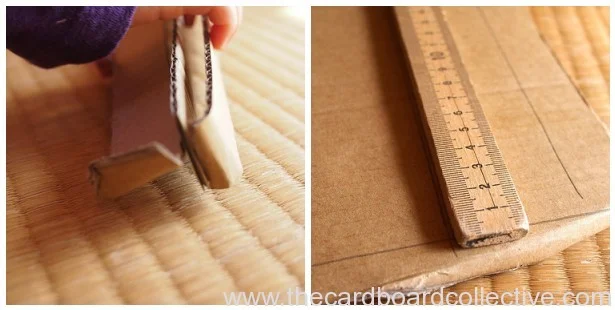
Just start with long cardboard strips, (mine are a rulers width), and drape them over the shoulders attaching horizontal strips as needed.
You can build a structure pretty quickly on which to start gluing cardboard skirt pieces and armor layers.
The rounded layers on the shoulders above are made by tracing a variety of bowls and plates, cutting them in half, then folding them and gluing them into place.
Really, it's not about the cardboard though, is it? It's about trying something new that you have never done before....it can make you sheepish. Well, I'm here to say: You can do this!
My inspiration: these incredible costumes from last year's challenge:
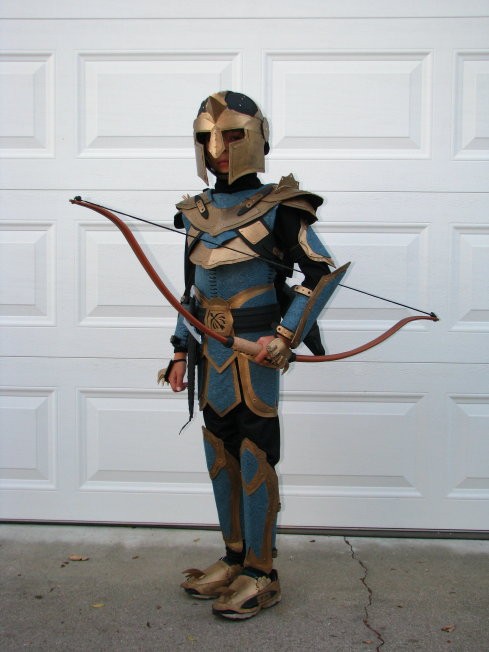
Archery Knight by Rachel and Tom Morgan

Cardboard Knight Costume by wrnking via Flickr


This morning I got an email that made my heart leap into my green tea......The above pictures attached to an email from newly hatched author illustrator Thyra Heder.
Thyra's written a new book called, "Fraidy Zoo." It's about a family that makes a series of animal costumes (one for each letter of the alphabet) out of cardboard and other household objects in the attempt to find out which animal is scaring the littlest member of the family from going on a trip to the zoo. I was totally inspired by the illustrations and instantly charmed by the creative spirit of the family in the book and had to share it with you!

Just as excitingly, Thyra's in the process of building the cardboard rhinoceros from the book right now, but you really should visit her blog to see some of the photos she's posted showcasing some of the other cardboard creations she and her friends have made in celebration of the upcoming launch of the book.
Fraidy Zoo is coming out November 5th and you can find more info here: at Indibound or pre-order it via Amazon.

We've started to add elements to the cardboard hat pieces we made yesterday. Eyes are made from watercolor painted paper liners for shipping apples and citrus and the green fringe on the front of the moth mask is made from egg cartons...


These are the beginnings of the head pieces the girls will wear for their butterfly and moth costumes. We will be attaching antennas and textured cardboard to complete them.
Simple Steps:
Cut strips of cardboard about 1.5" wide and longer than you need to wrap around your head.
Measure cut and glue a strip of cardboard together so it fits around your head.
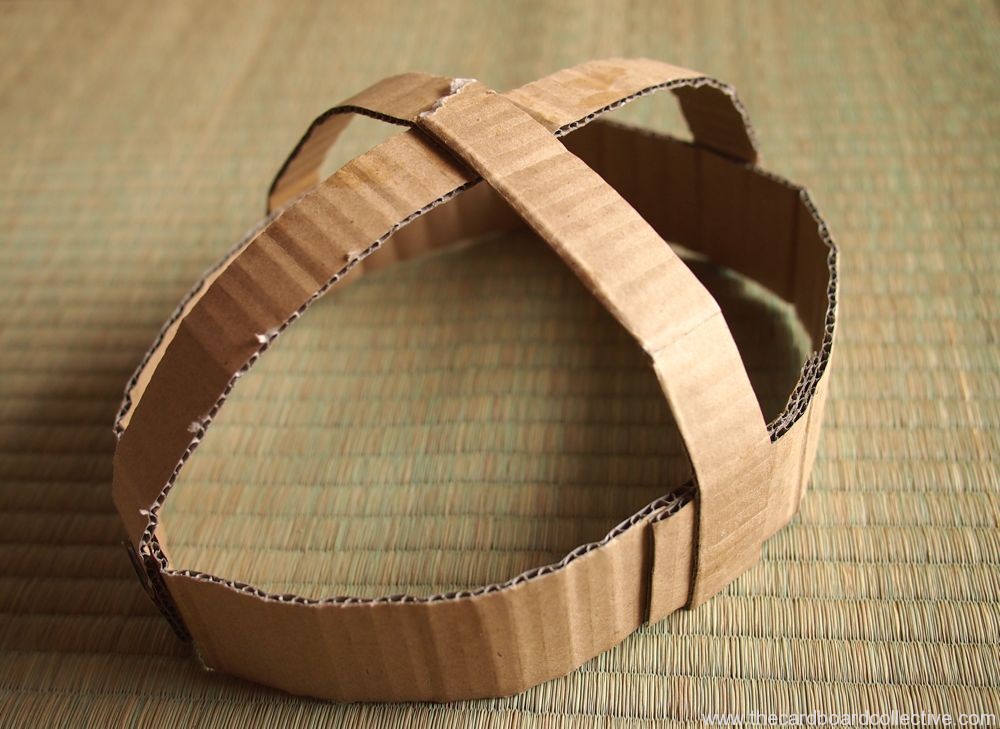
Attach 2 more cardboard strips so that they cross over the mid point of your head.
Add additional strips as desired.
Use this base for attaching ears, horns, antennas, or a mask.

When my daughter decided that she was going to be a butterfly this year, we thought, hey why not be a whole family of insects?
Then the real thinking began and we each had to commit to our insect of choice... My husband chose early and is following an entirely logical, and proper plan for attacking his costume, bit by bit. Although it's not typically my style ( I wish it was), I'm going to try following his approach this year too.
Here's what we've done so far:
1. Create an inspiration board. I like to use Pinterest. Here's a link to the board I'm using for my Grasshopper costume. I usually try to gather examples from the following categories to get a well rounded amount of inspiration and produce a unique and creative costume.
realistic images (many views)
inspirational costumes
images that address problems or difficult parts
images that inspire shapes or moods
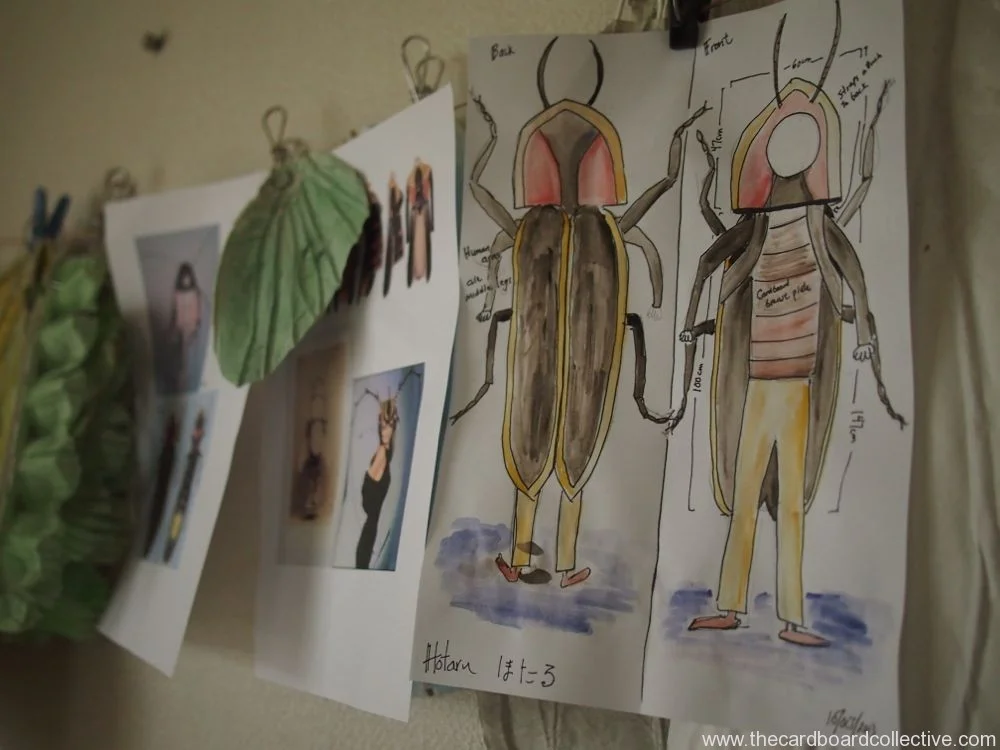
2. Create a detailed sketch of your costume. I like my husband's approach of folding a regular piece of white paper in half vertically and drawing the costume from the front and back. It keeps it simple. After drawing, he began to add measurements.
3. Collect materials and prototype. I like to try smaller versions of some costume parts first to see if my ideas will work, then I know if I have to keep trouble shooting any parts of the costume.
How about you? Are you well on your way, or just getting started?


To make the costume you'll need:
white paper egg cartons
white newsprint or tissue paper (rainbow colors would be great!)
toilet paper tubes
metallic cardboard, (or rainbow paint your regular cardboard)
stapler
Simple Steps:
cut a rectangular strip of cardboard about 4 inches wide and 10 inches long
fringe newsprint, then fold the ends over the cardboard and staple
cut ears from egg cartons and attach with stapler
create cone shaped horn from metallic cardboard and staple down
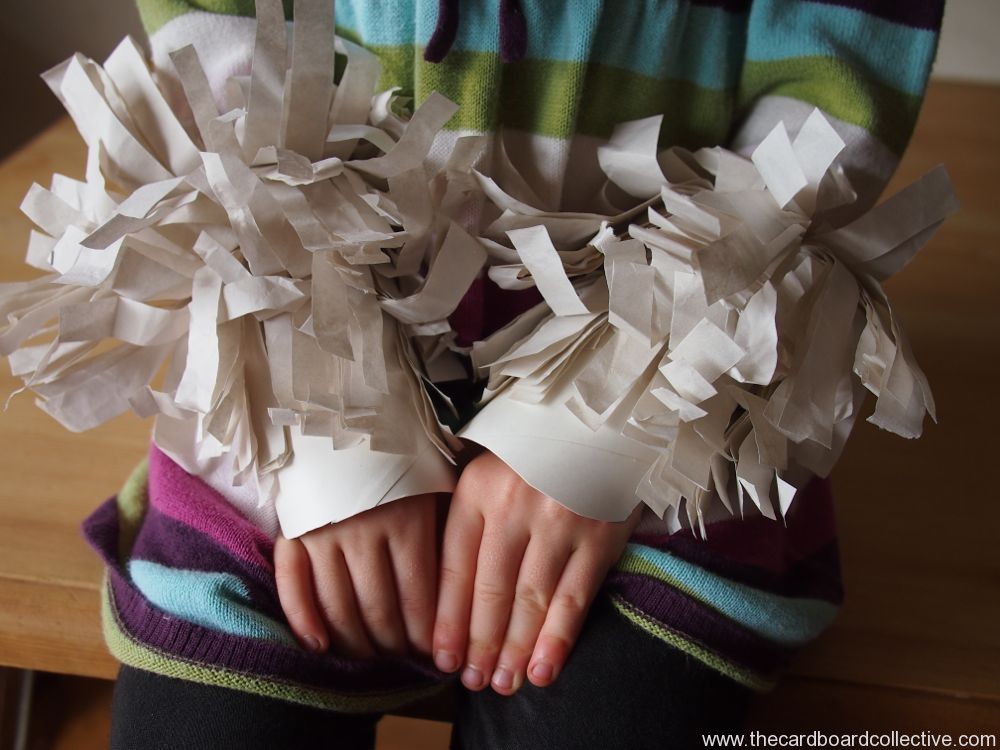
cut toilet paper tubes so that they can fit over your wrists and ankles like a cuff
fringe more newsprint and staple to cuffs (place tape over staples to avoid irritation)
shape the ends of the toilet paper tubes to look like hooves.
[slideshow_deploy id='4591']
Cardboard Kryptonite! We had light rain just after our event was set up for The Global Cardboard Challenge on Friday. Sadly, most of the kids we anticipated didn't show up. We didn't lose heart though, and a few brave souls trickled in after the weather cleared to inhabit the cardboard dwellings that were created. As always, it was great fun and I couldn't have done it without my husband's help, or the wonderful folks that run the play park adventure playground.
I had such a great time this year getting to know the folks at The Imagination Foundation, as well as other Cardboard Challenge organizers from around the world. This year there were more than 43 countries represented and 100,000 kids at the Global Cardboard Play Day. If you've ever thought about planning an event for your community next year, be sure to visit Caine's Arcade to find out more. You can be part of this amazing and inspiring cardboard movement!
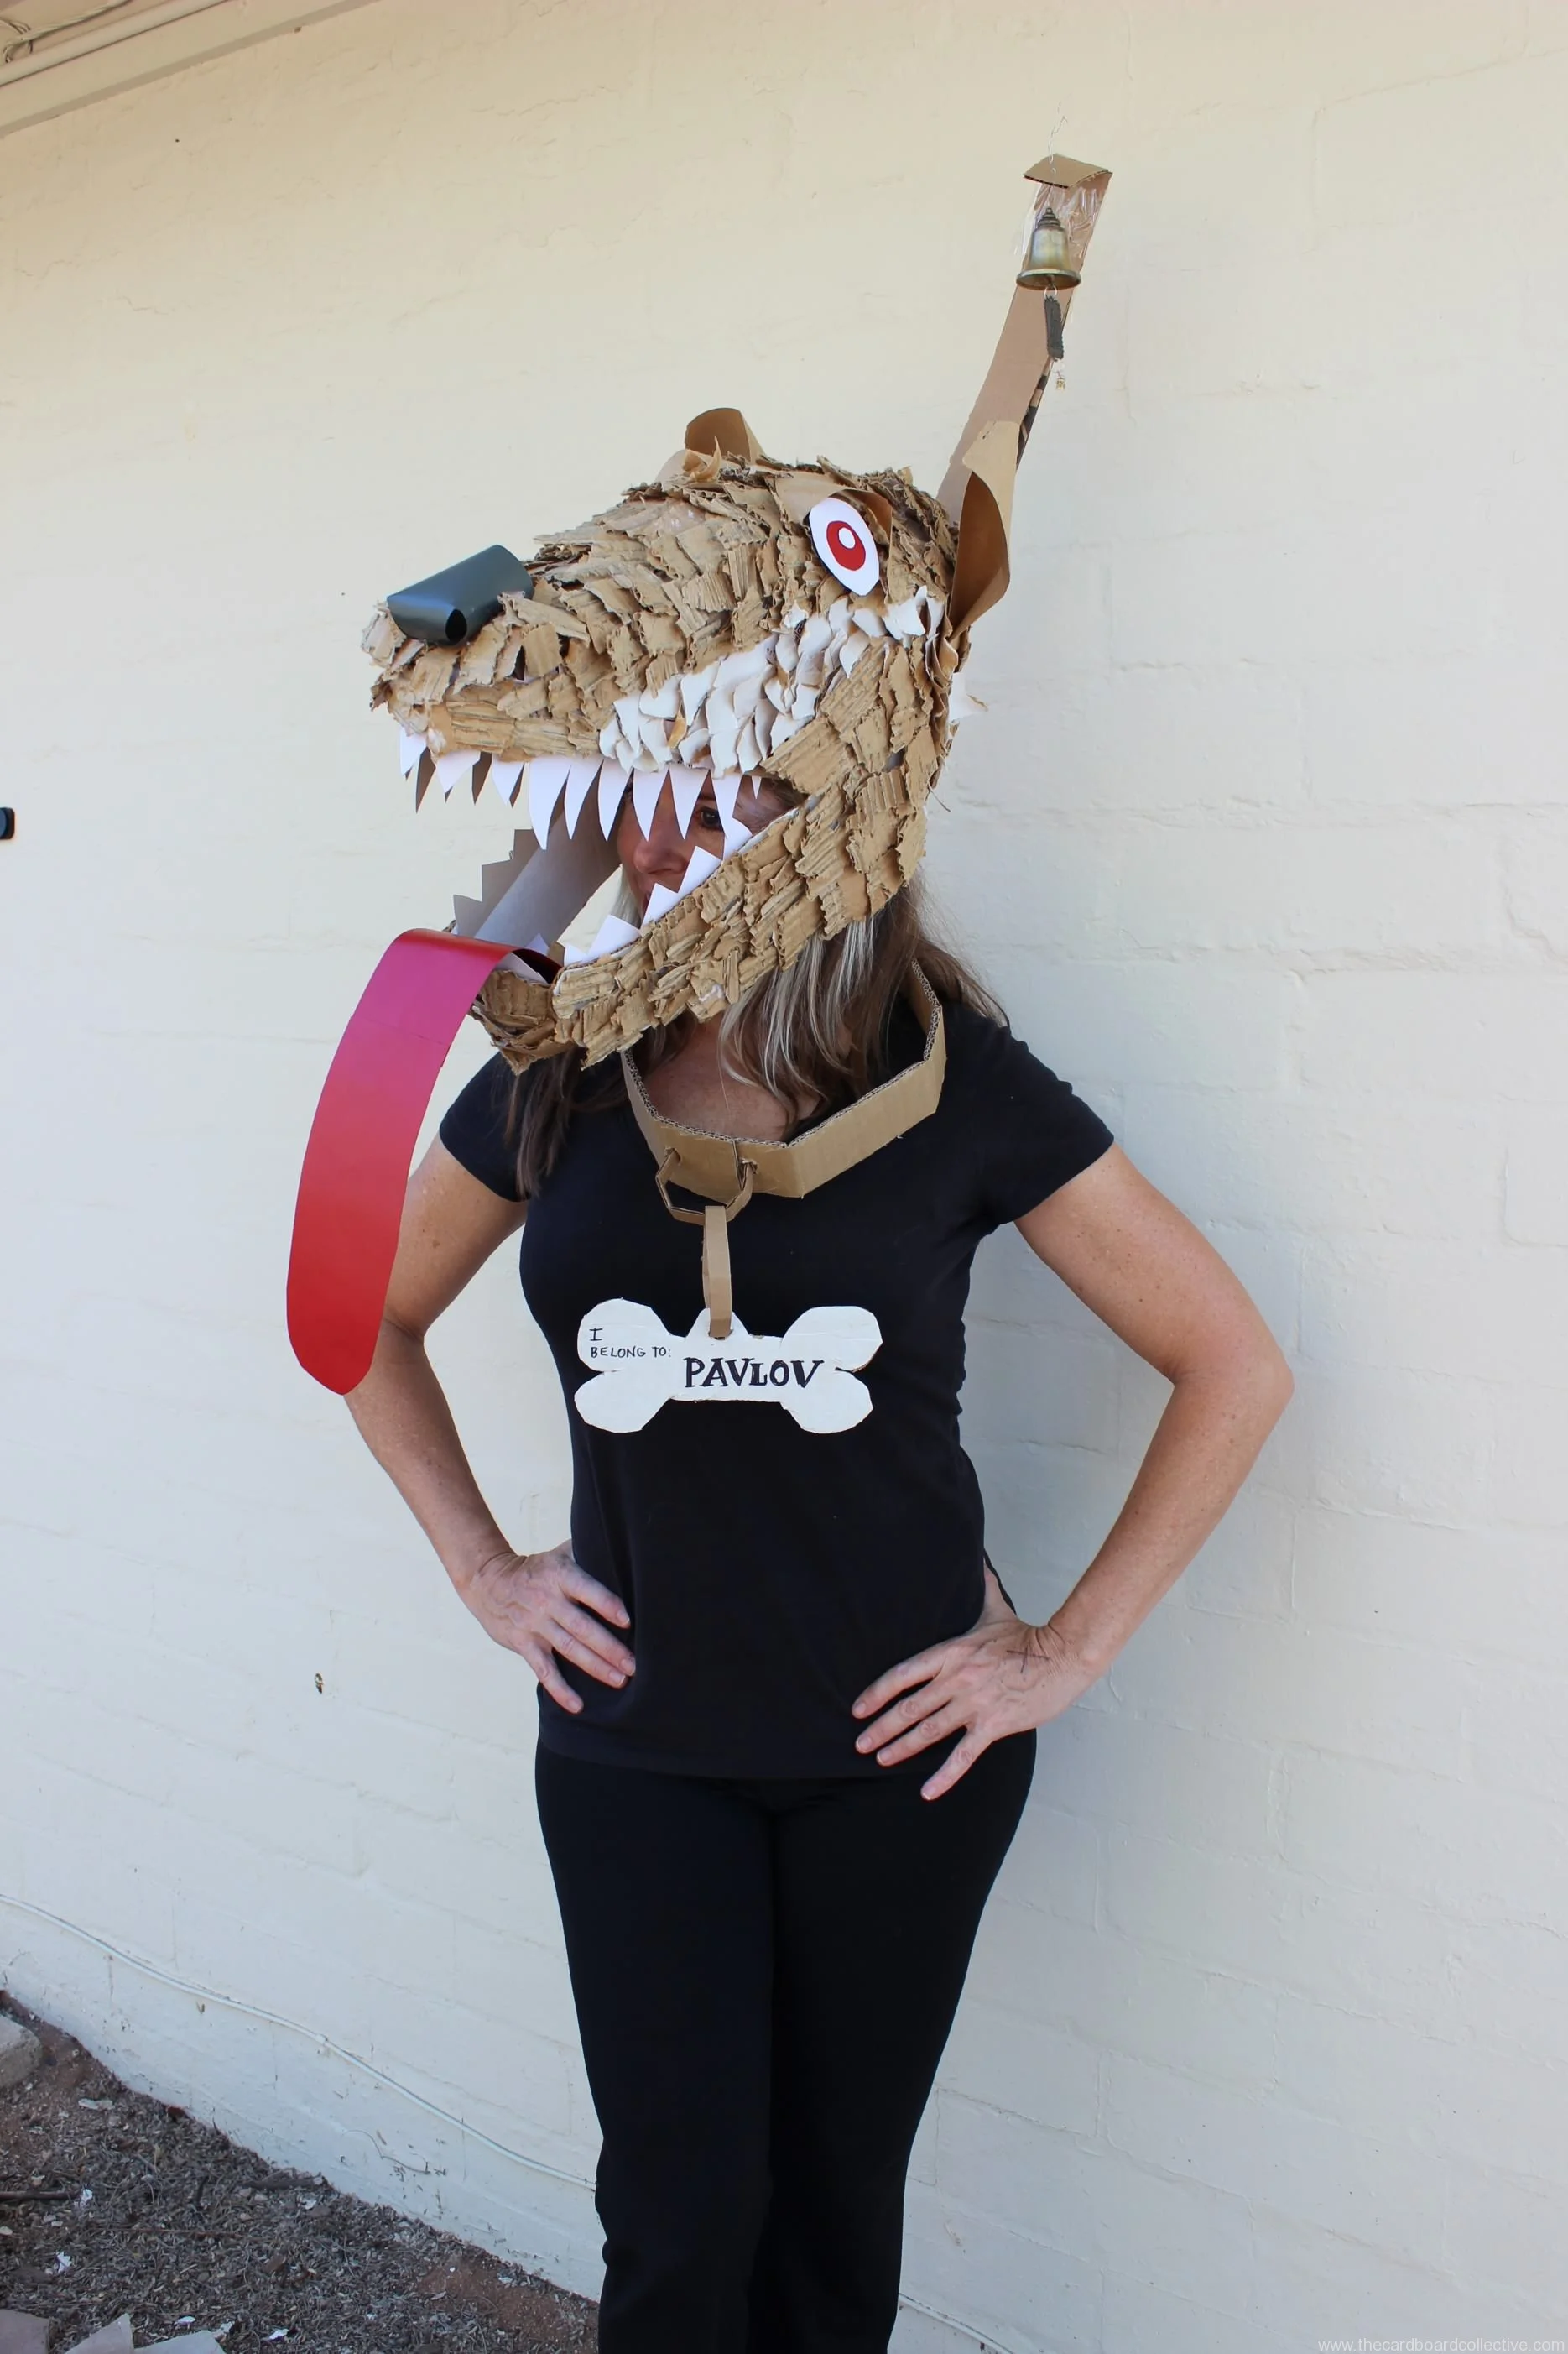
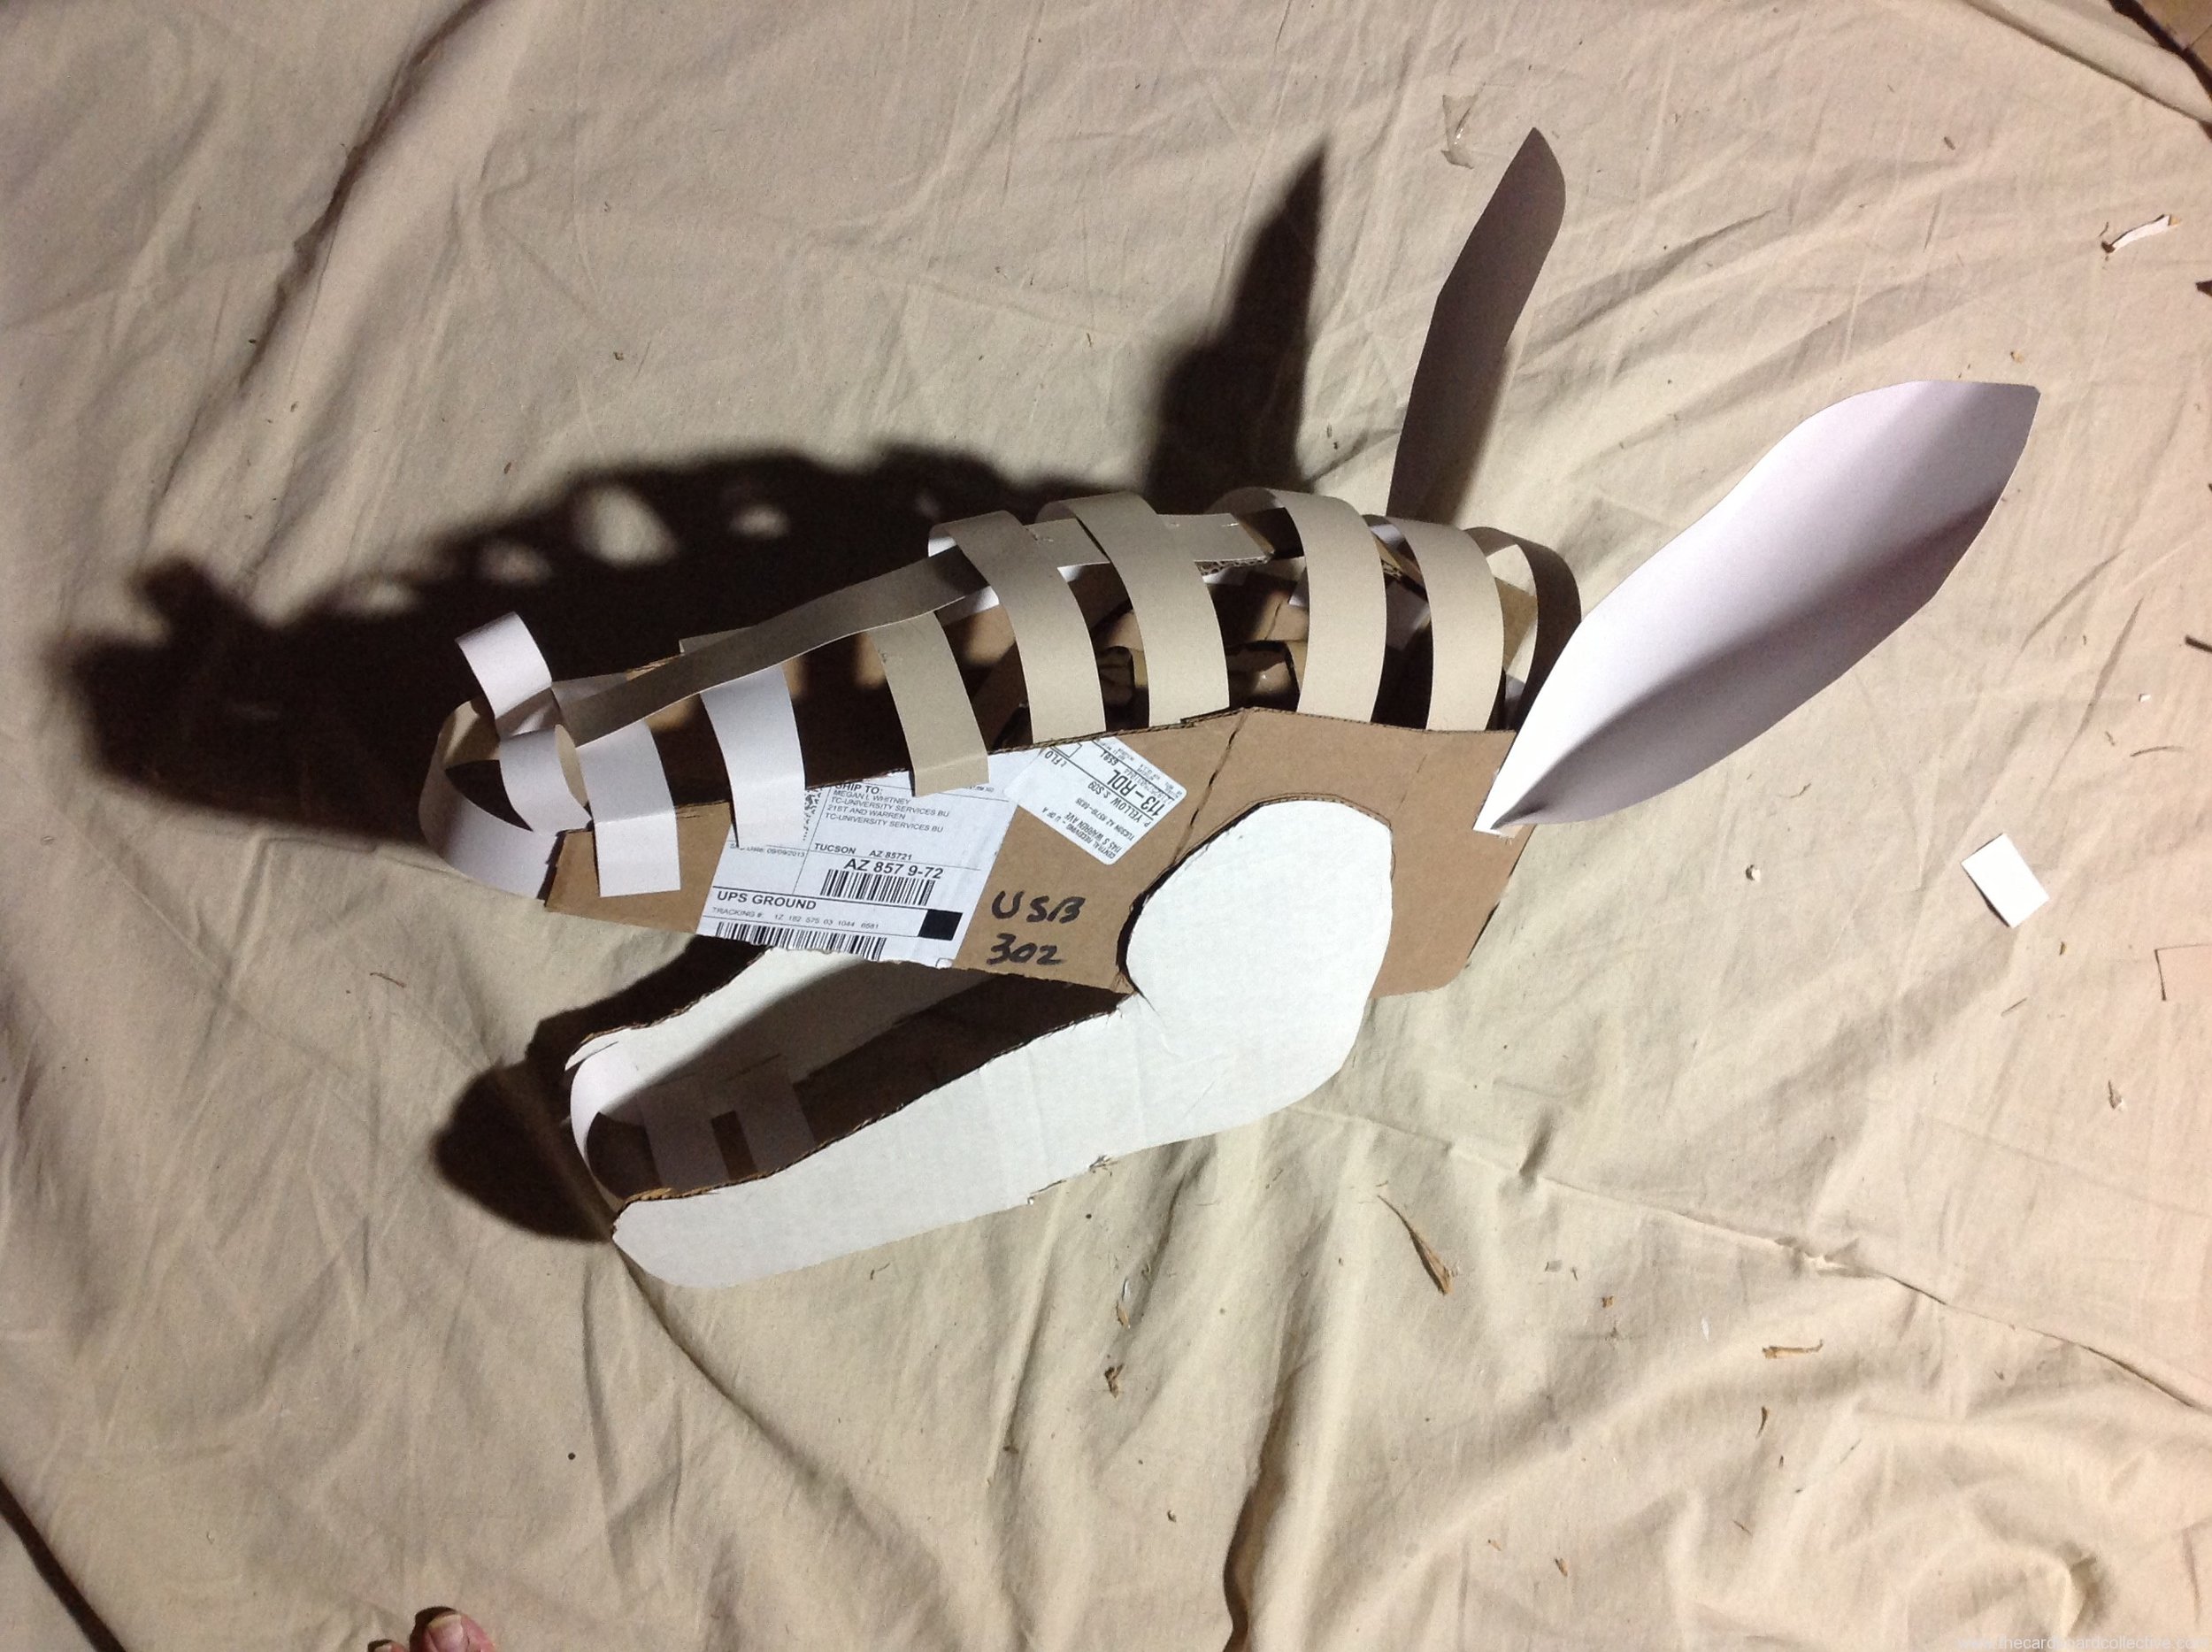
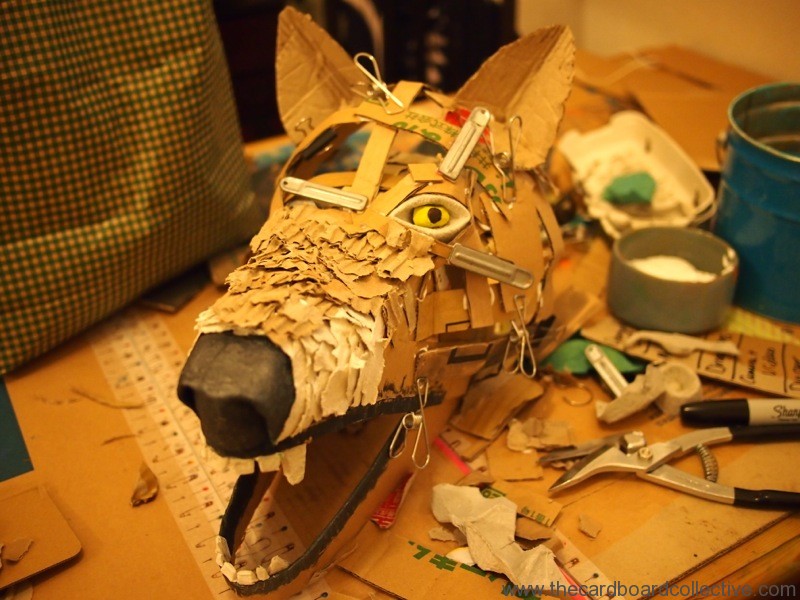
We've already gotten our first photos for the Cardboard Costume Challenge!
Christine Scheer made this incredible Pavlov's Dog head entirely from cardboard for a cardboard costume charity event she attended in late September.
You can see how Christine started her head by making the upper and lower cardboard jawbone pieces and then used strips to connect the pieces.
This a truly original costume idea! Thanks for sending your awesome pictures Christine!
Cardboard Costume by Christine Scheer
If you're thinking about making a cardboard headpiece for your Halloween costume, this weekend is the time to get started! Last Year we created 2 different kinds of cardboard heads, using two different methods.

The first head was for a chameleon costume, and utilized the hood pattern for sewing a kid's jacket. To read the post about adapting a sewing pattern for use with cardboard, click HERE
The second head was built by making a cardboard skeleton and then gluing down layers of ripped cardboard. You can see more pictures of the development HERE.
Because every cardboard head is a little different, I'll lay out the most basic steps so you can get started. Have fun and experiment, the point is to develop you're own style...
Make a cardboard band that fits snugly around your head.
Create cardboard side pieces that are similar in shape to the skull of the creature if you look at it sideways.
Glue or staple the pieces to the cardboard band.
Use cardboard strips to connect the side pieces and shape the front of the creature's face.
Cover your cardboard head with crumpled up and flattened out copy paper, fringed newspaper, Kraft paper, torn pieces of egg carton or ripped pieces of corrugated cardboard. You can take a look at the Cardboard Costume Pinterest Board for more inspiration.
Here's a great video by John Gleeson Connolly (via Apartment Therapy) talking about how he made a simple cardboard dragon head for his son's Halloween costume using a similar method. http://vimeo.com/51576209

YYYYEEEEEESSSSSS!!!!! Today is the Kick-off for The 2nd Annual Cardboard Costume Challenge!
The Mission? to inspire the making of awesome handmade cardboard costumes.
My secret agenda? Help parents reconnect with their kids (and themselves) through making.... and my even more secret agenda, rid the earth of flimsy, flame-retardant Halloween costumes destined for the landfill.
I decided that this year I wanted to adopt a non-commercial, non-competitive approach (less contest, more spirit tunnel) AND I wanted to make the event more kid-centered (it's such a valuable design opportunity for kids.) I also wanted to encourage adults, who maybe don't own a sewing machine, or don't think of themselves as "creative" to branch out and try dabbling in cardboard.

Cardboard Cowboys by Leelada via Flickr
My own creative mother found the costumes entered last year so amazing she said she was too intimidated to attempt a cardboard costume! This year there won't be any categories, sponsors, or prizes.....just an event for sharing cardboard enthusiasm and the love of making!
So what do you think? Sound interesting? You can follow posts and tutorials throughout the month of October centered around topics like cardboard hats, masks, accessories, and other costume extras plus info about tools, tips for working with cardboard, and moving from idea to finished costume.
Upload pictures of your costume in progress (as well as completed) HERE in the Flickr community and access past tutorials HERE.
P.S.
There are a few prize related contests and opportunities out there that you should know about if you would like to enter a competition (with some pretty substantial loot.) We'll definitely be rooting for you!
Inhabitat Green Halloween Costume Contest (adults)
Inhabitot Green Halloween Costume Contest (kids)
See you soon!

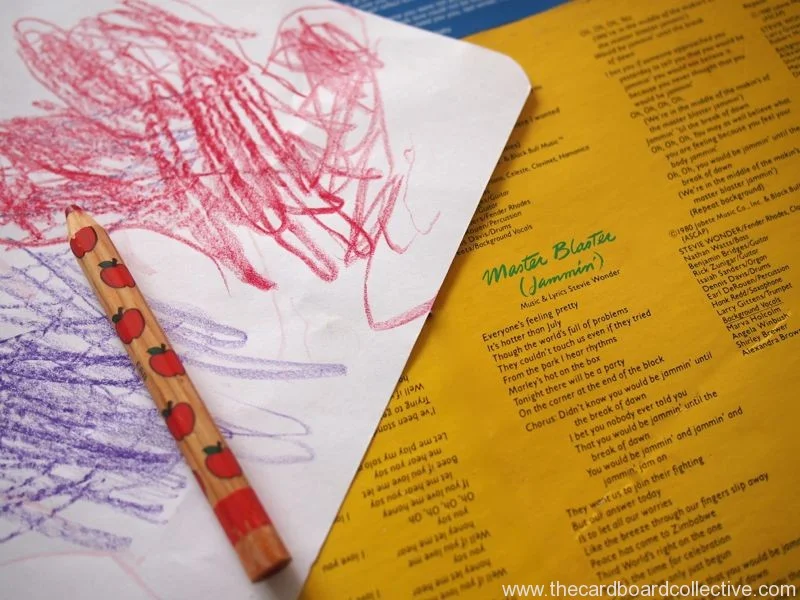
It was a pleasant discovery to find out that old album covers can be opened up to create a large, 4 paneled piece of cardboard for the Totem Box table and stool tops.
You may or may not have noticed from my previous pictures that Stevie Wonder is gracing the surface of our Totem Box table. If my daughter does in deed learn to read from constant exposure to "Master Blaster" lyrics, I'll be the first to let you know.

The album cover cardboard is pretty durable. It can recover from a spill as long as it isn't left standing too long, but if you're after something that you can truly pass a rag over, I suggest re-purposing shiny, plasticized paper shopping bags.
The plastic is not recyclable, but I'm pretty sure that these bags are processed without a problem at most paper recyclers. We are able to put them out here in Japan, and I pick them up from other people's recycling piles for the odd project here and there.
While cardboard still rules, it's nice to have options...


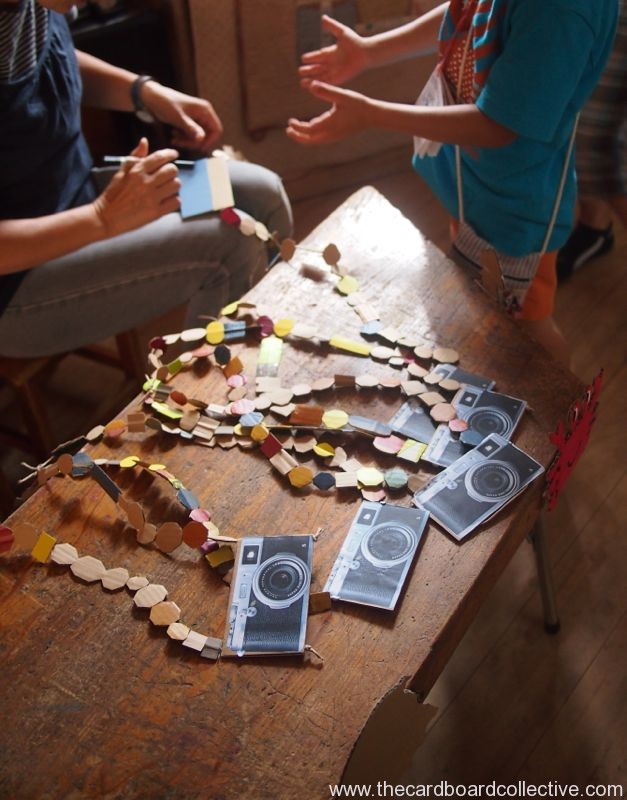
There are so many adorable ideas for cardboard cameras on the internet, but this one comes from the first post I ever published on The Cardboard Collective about cardboard beads. When I got my new camera, I had the paper camera brochure left over, and glued it to some cardboard. We strung it with some cardboard beads on paper twine to make one of the more popular items in the girl's jewelery box.
Recently I joined up with about 15 other mothers from my daughter's yochien (Japanese preschool) and we made cardboard camera necklaces for all the kids at her school. The cameras were a prize from our fishing booth at the summer festival.
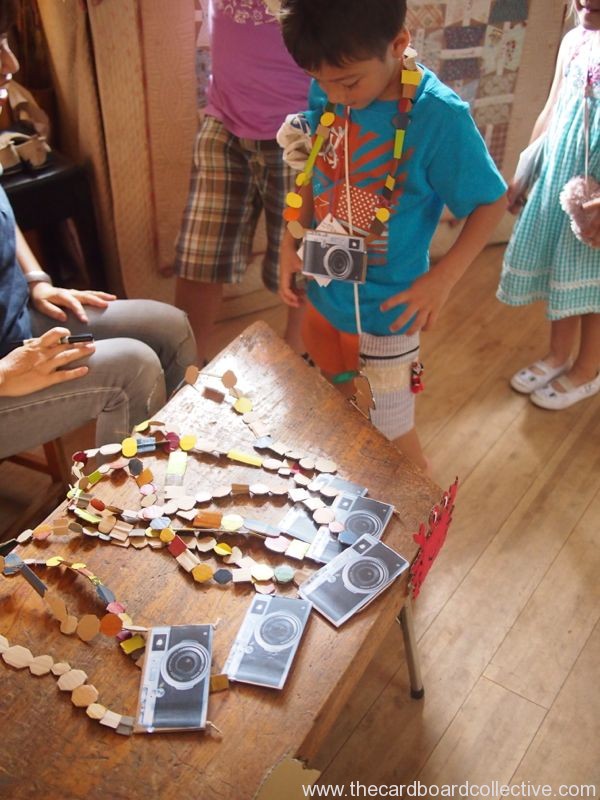
It was SO fun to see the kids snapping photos of each other. Since most of the parents were also walking around with their cameras slung around their necks, there was the slight excited air of a press conference announcing the magic of summer; more kiddie pools and popsicles to come....

Some of the kids know I helped make the cardboard cameras, so it was cute when they pretended to take my picture. A sweet way of trying to communicate and be playful with me. Of course I love kids AND cardboard, so I was pretty smitten the entire day.

Say "チーズ!"
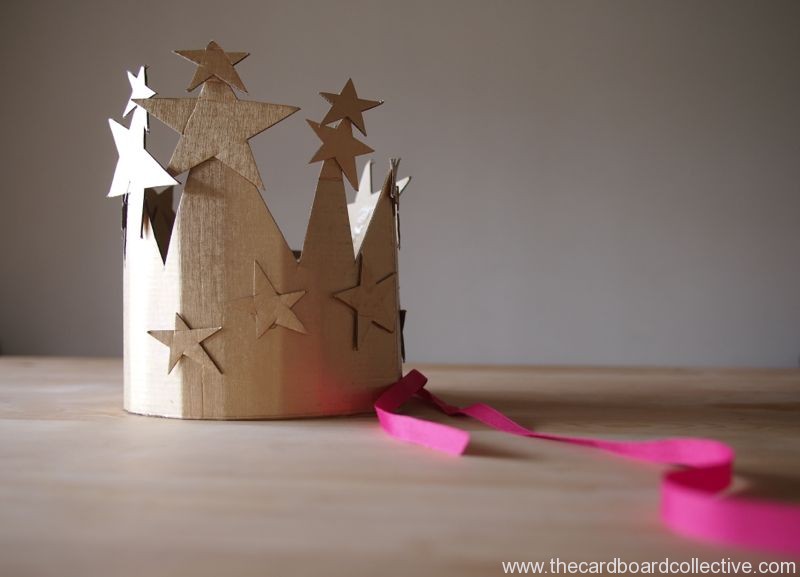


An easy beautiful birthday crown that my daughter put together on her big day. She wants to wear it again next year, and I agree it turned out beautifully. There is definitely a Glinda, Good Witch of the North quality there.
If you can't find gold cardboard, try jarred gold paint and pizza box lids........
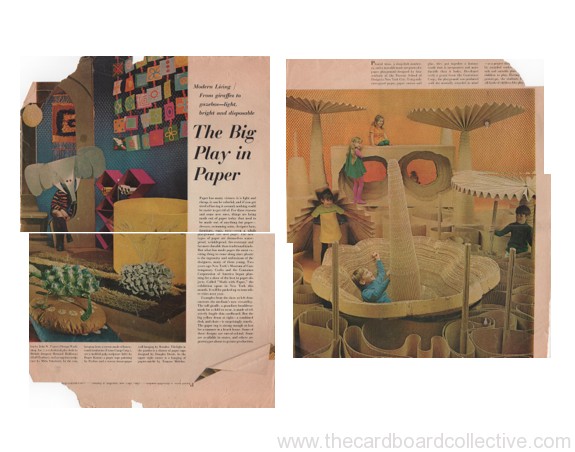
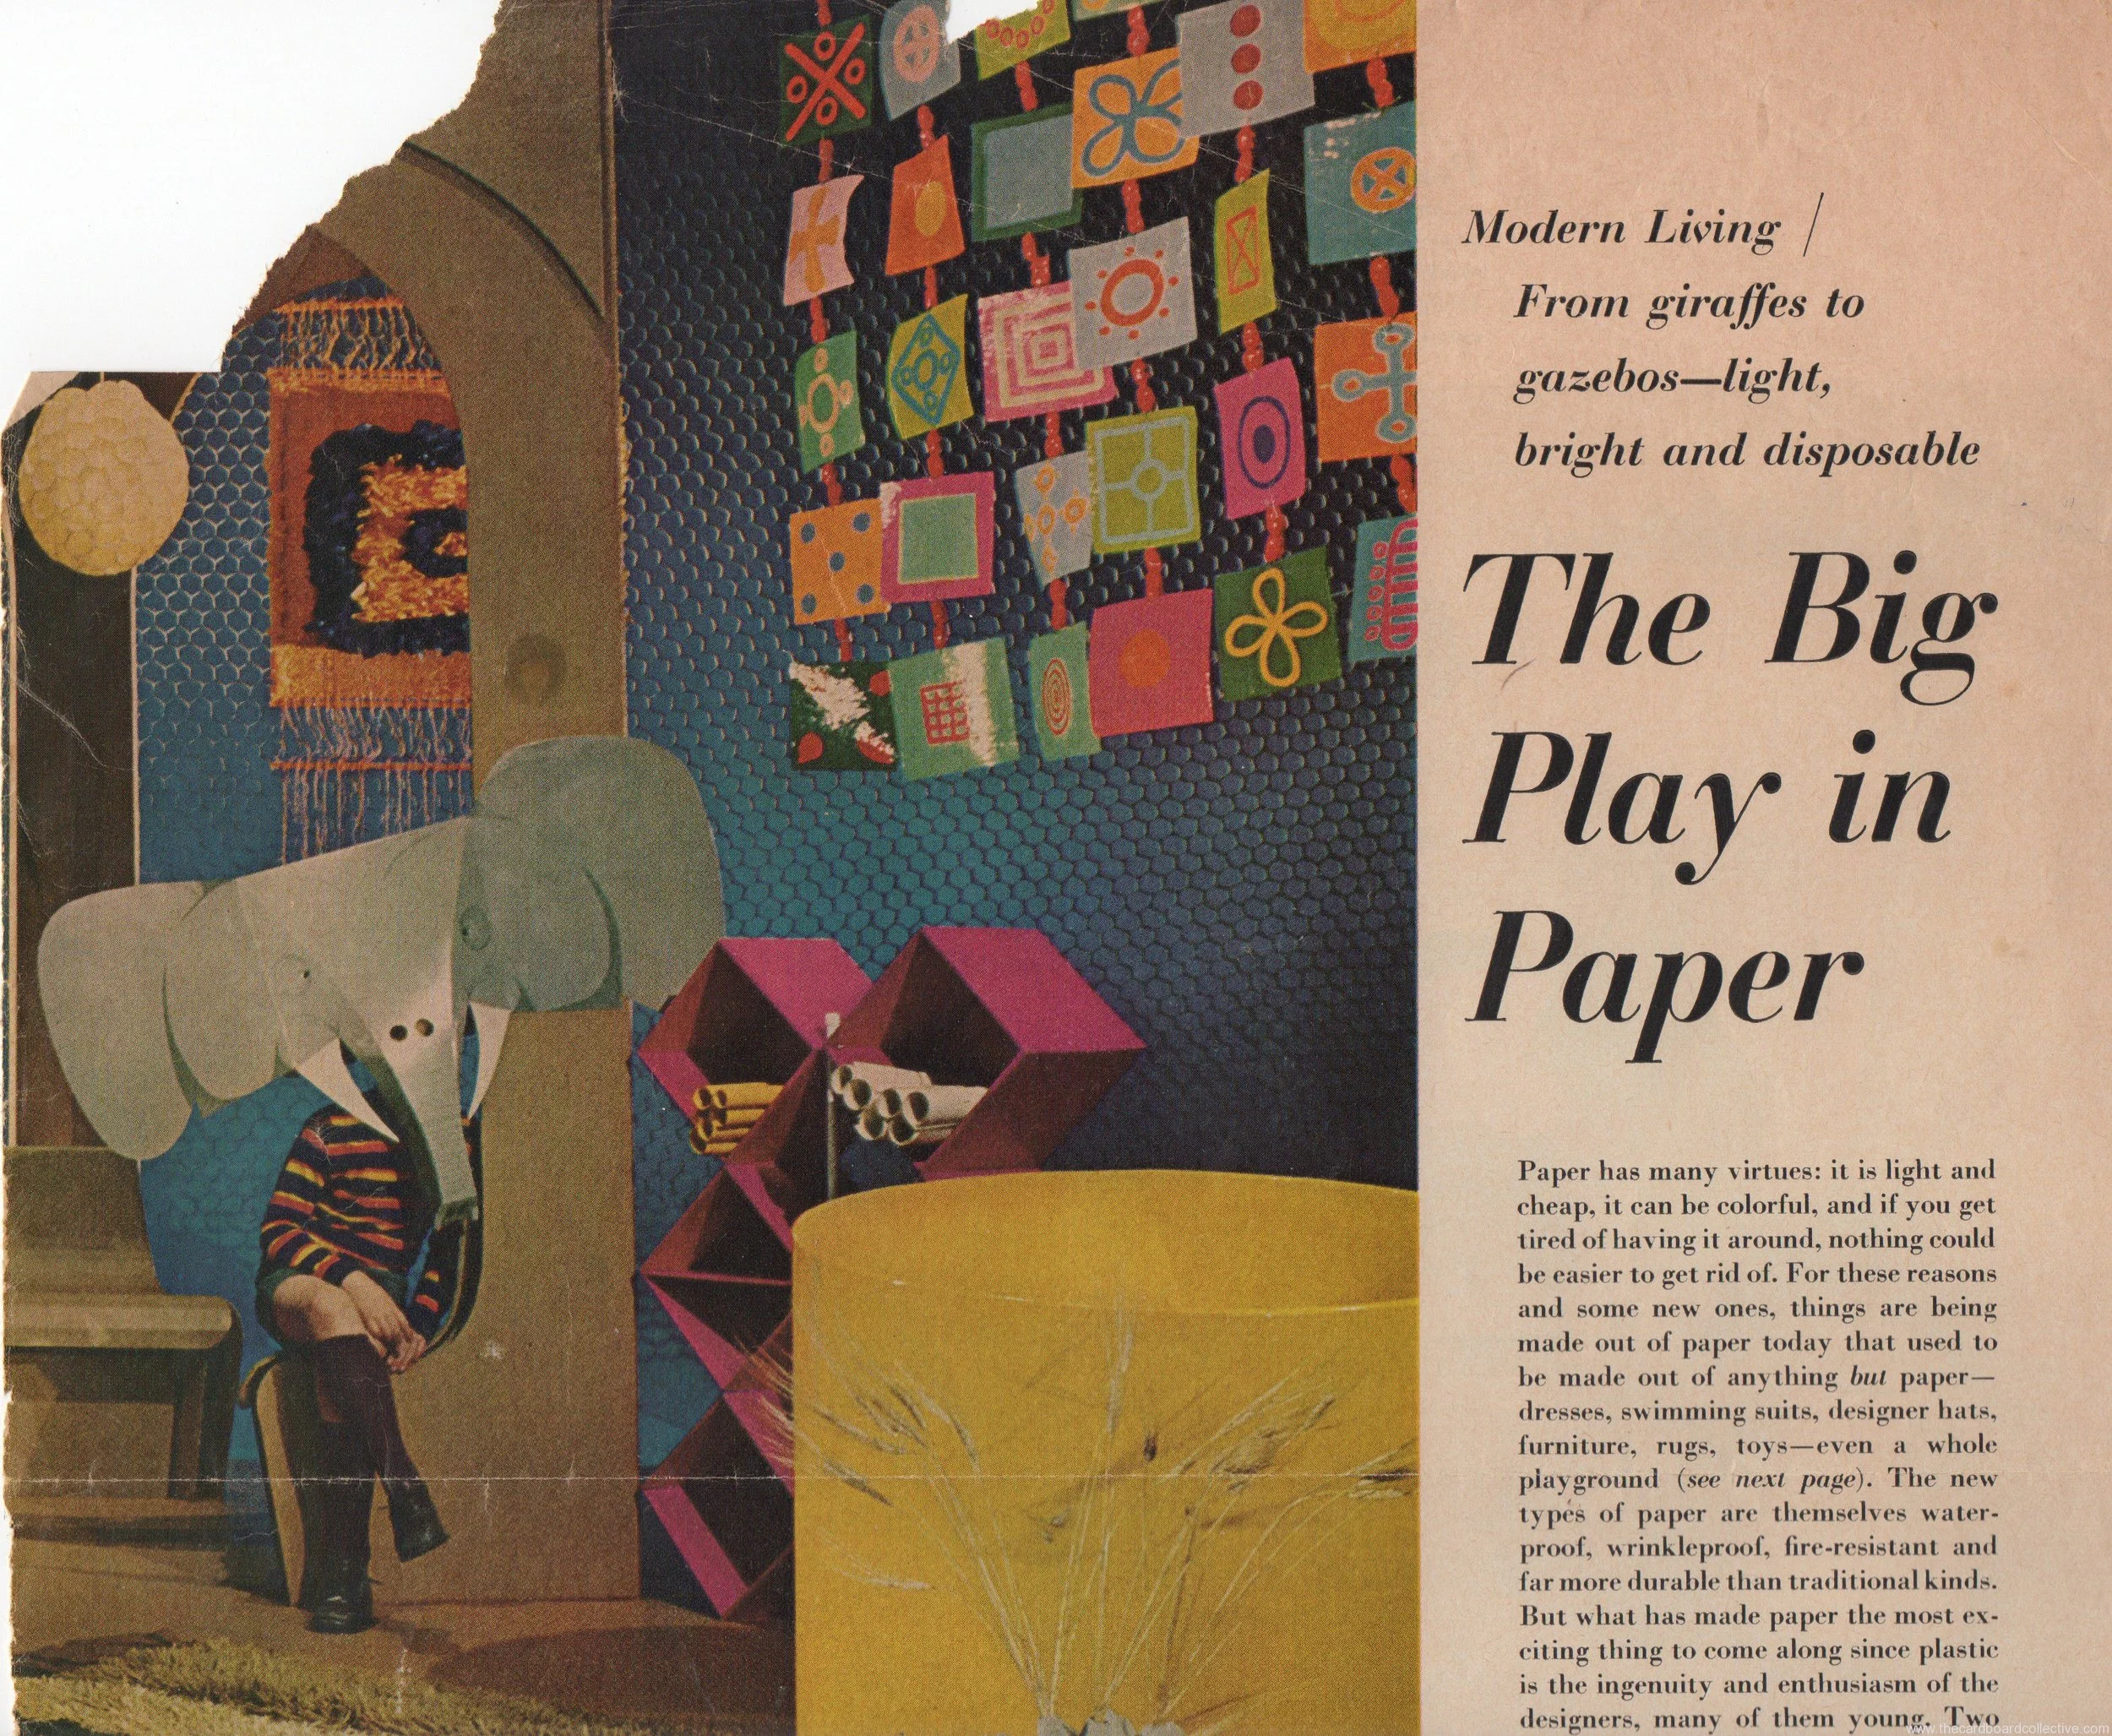
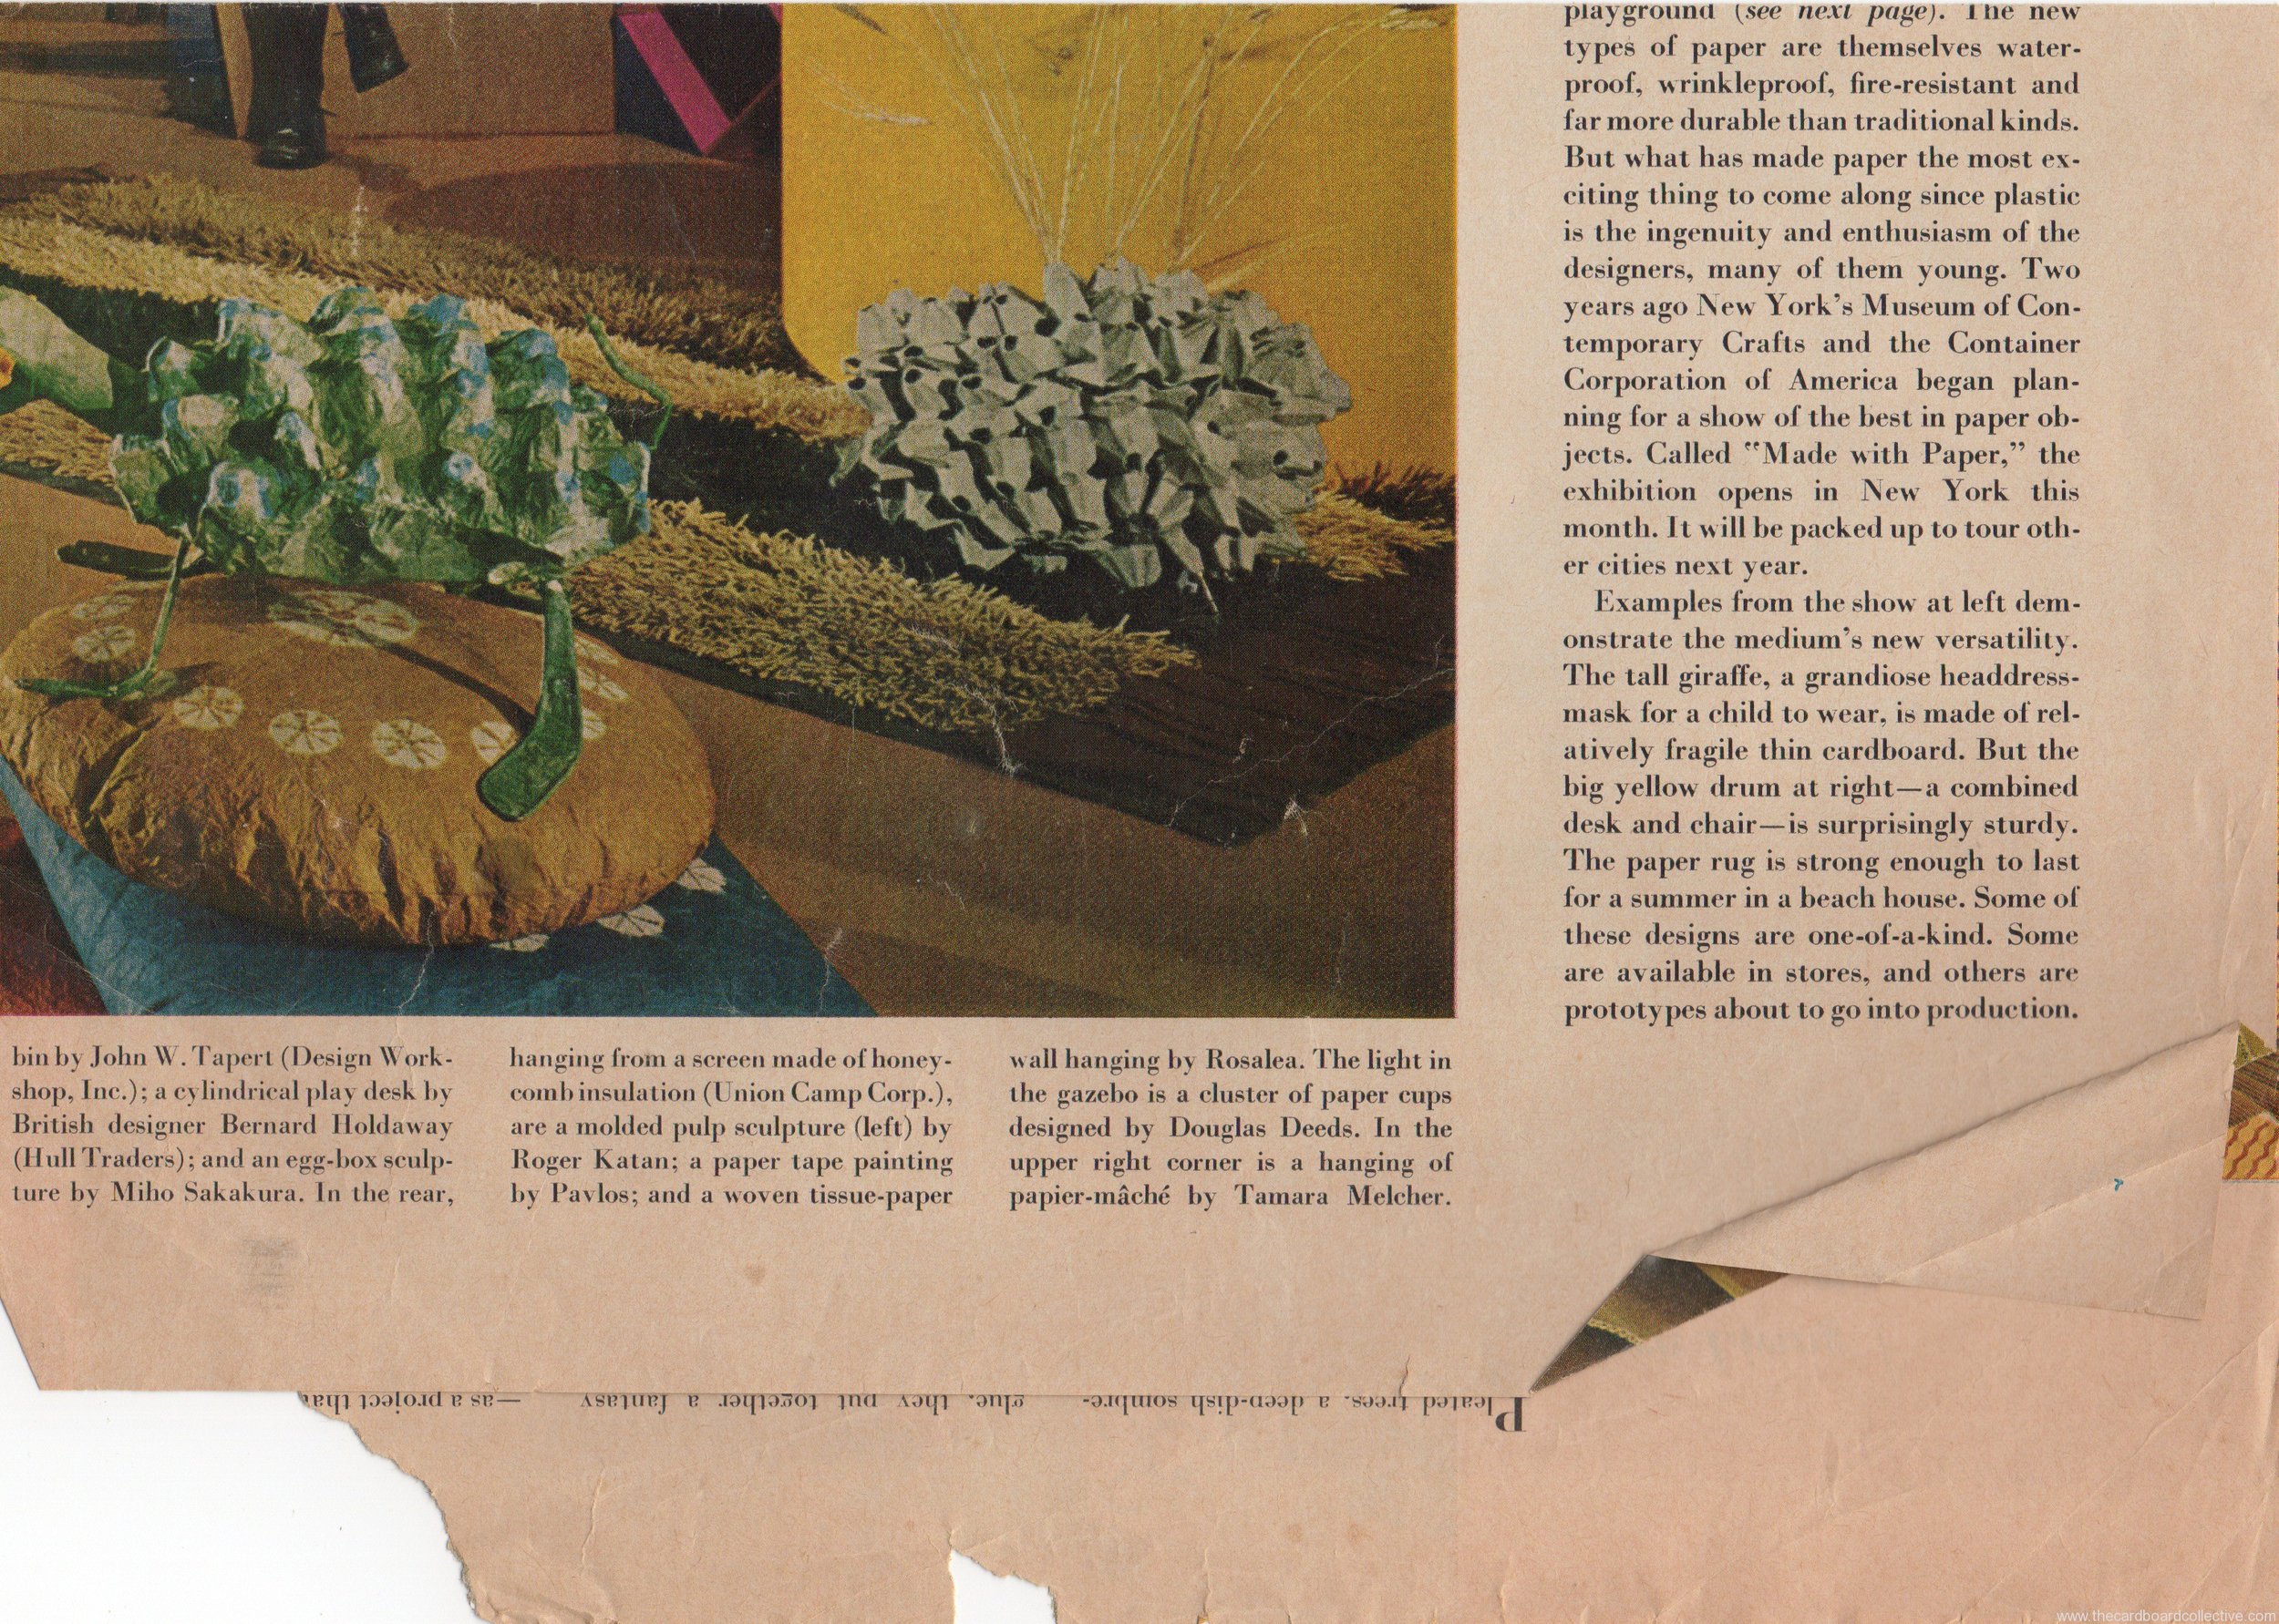
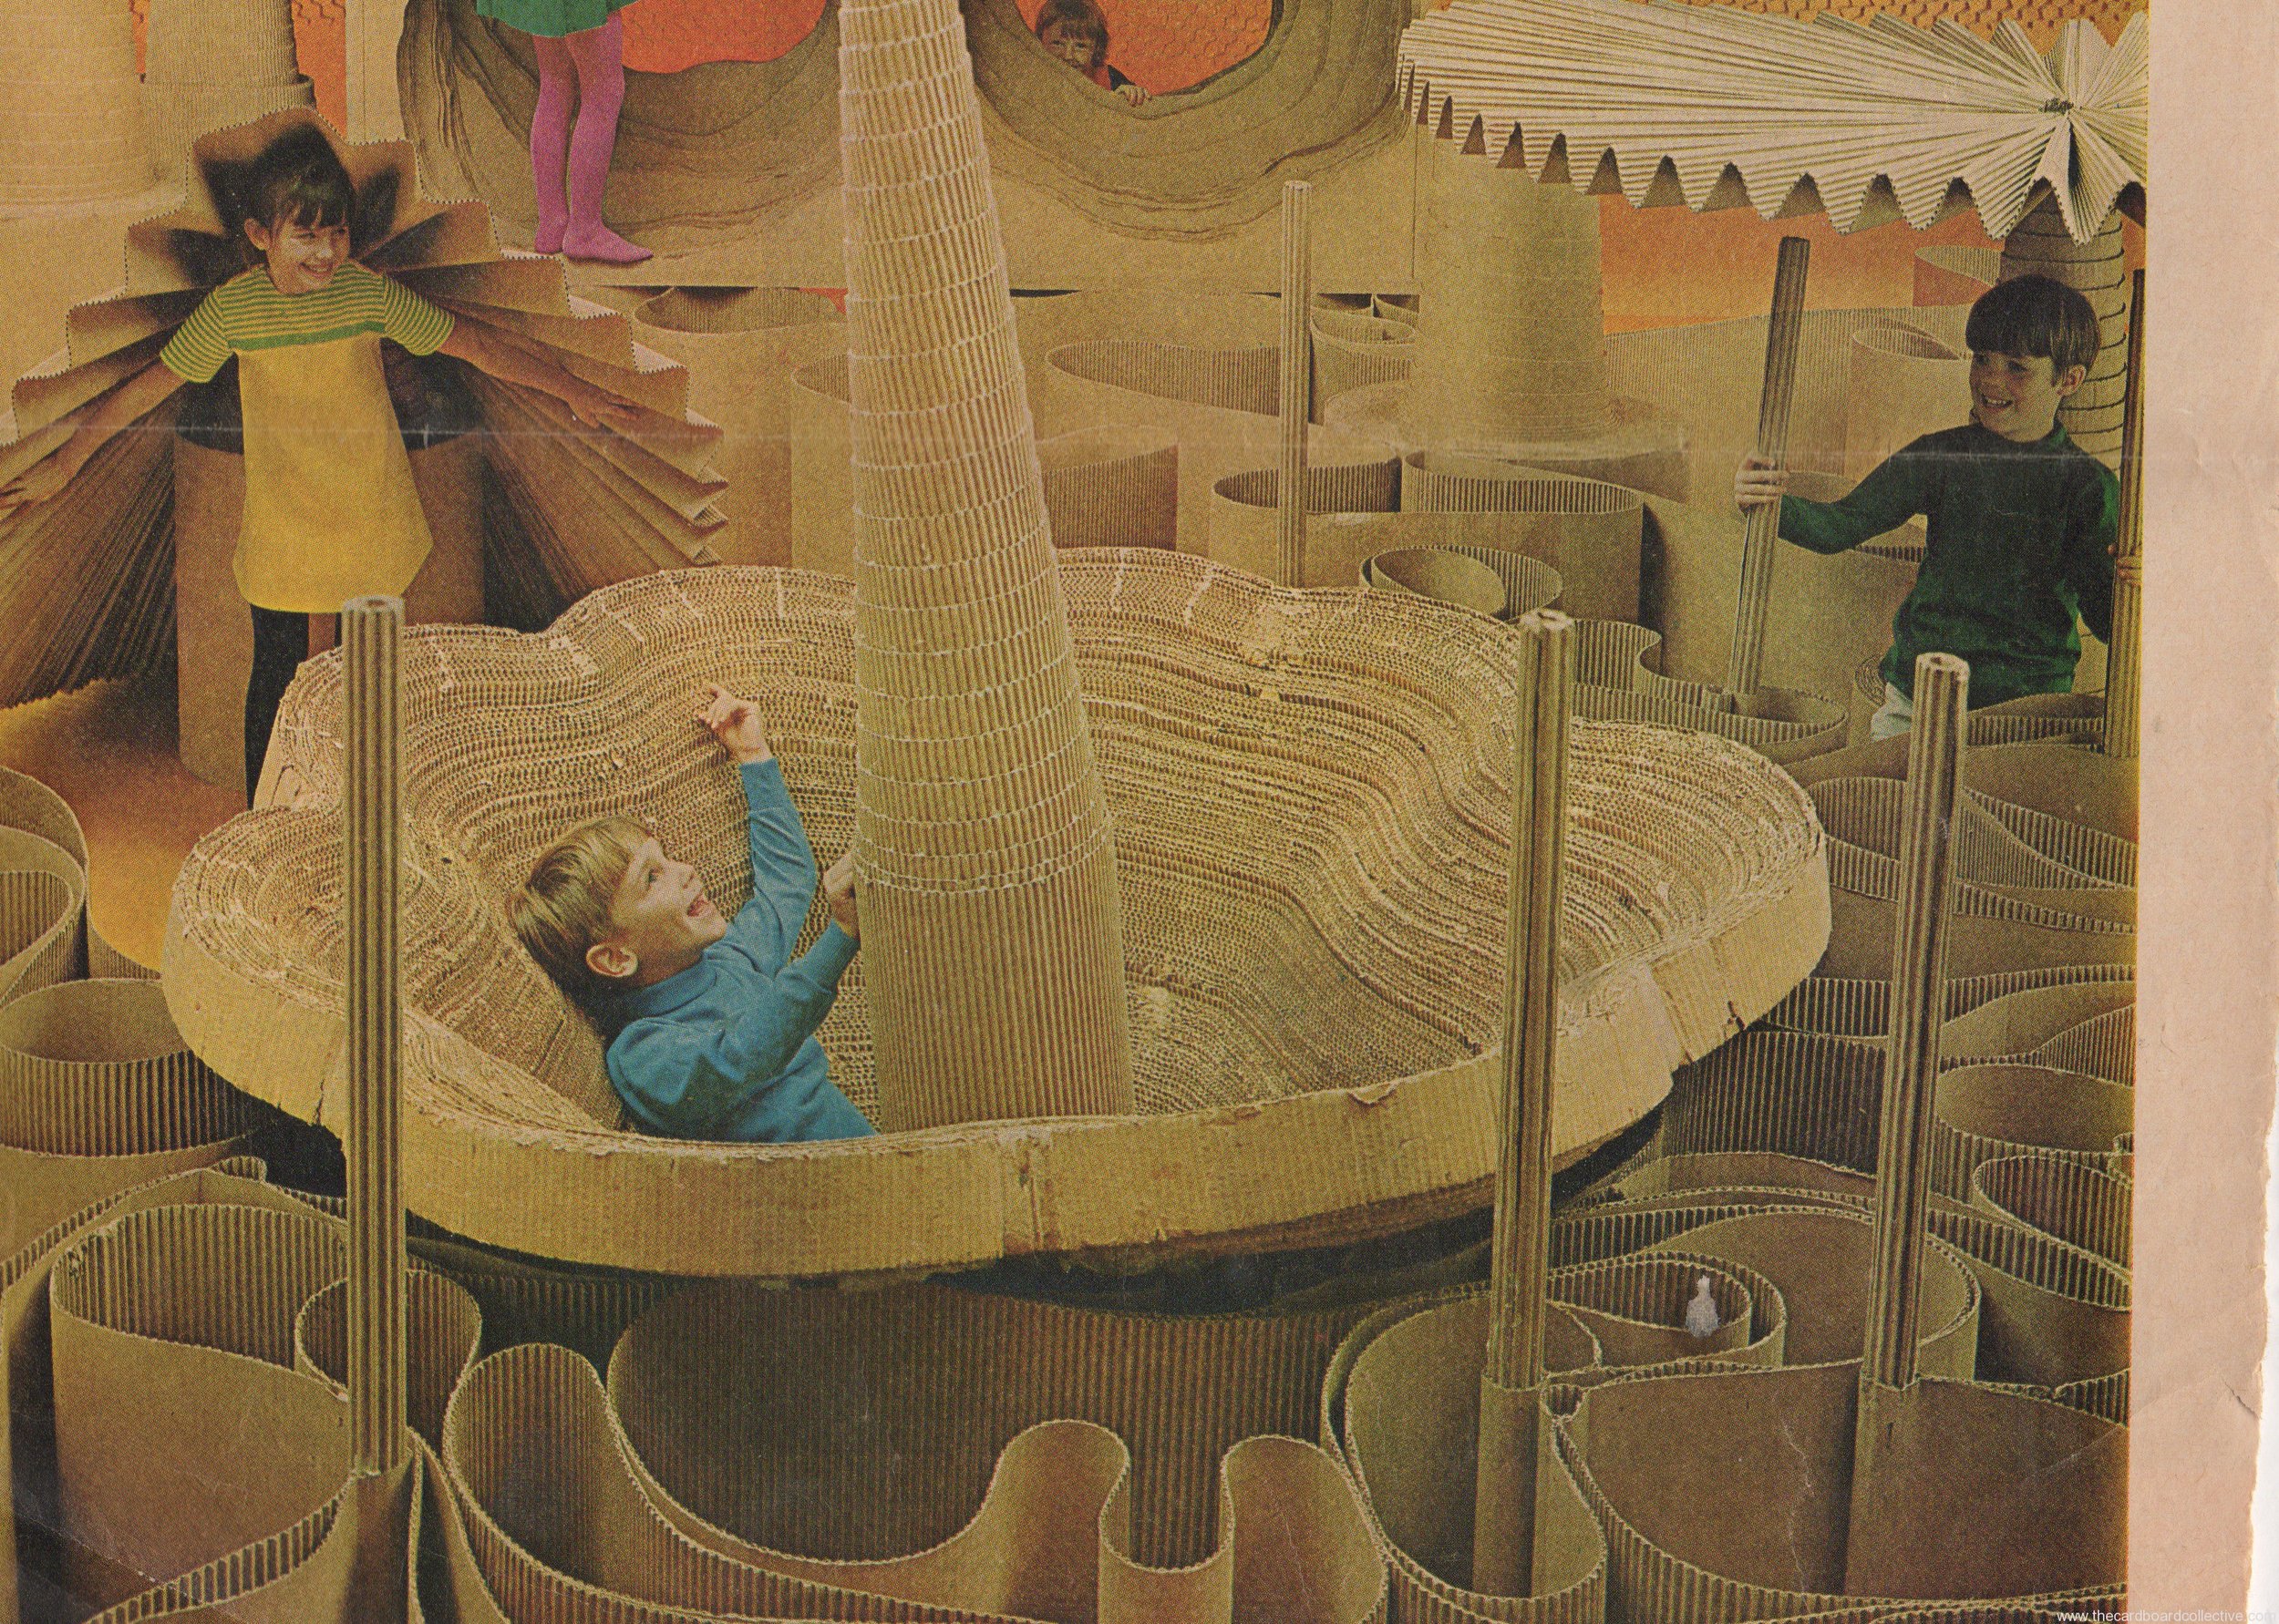
LIFE Magazine - November 3, 1967 (Volume 63, Number 18)
Big Play back top Rescan
LIFE Magazine - November 3, 1967 (Volume 63, Number 18) Page 3

LIFE Magazine - November 3, 1967 (Volume 63, Number 18) Page 2
LIFE Magazine - November 3, 1967 (Volume 63, Number 18) Page 1
Wow, check out this 1967 LIFE magazine article entitled, "The Big Play in Paper", that was lovingly rescued and scanned by my friend Miss Meryl Ann Butler during a recent Spring cleaning.
Meryl Ann and I met while taking online classes from Diane Gilleland at Crafty Pod, (I learned almost everything I know about blogging from those classes) and I got to know Meryl Ann by her spit-your-tea-out-hilarious sense of humor and from the really helpful stuff she posted in the forums (she has a long and distinguished career in the craft industry.) She is the author of the book 90 Minute Quilts among, many others and she has an intensely joyful, vibrant style with a personality to match.
Meryl Ann recently sent me an email message explaining that:
"This clipping was in my "morgue file" which was a file we had in the olden days before electronic files… with clippings of images that might inspire future artwork. My file had thousands of clippings, and I just threw most of it away a couple of days ago - a hard thing to do, since I had collected images for a long time - well, at least from 1967, lol! I only saved a couple of them, and of course the second I saw this I thought of you, Amber!"
How very thoughtful, and how entirely awesome. Enjoy a trip back to the glory days of cardboard......................we'll relive them again soon?
When I released the Totem Box pattern a few weeks ago, I alluded to the fact that this was a design that I used to manage the "little" toys in our house, but the thought behind the design goes a little deeper.
Quite a few months ago, I made an online friend named Allie who writes the blog, Bakers and Astronauts (as well as Play Lab). Allie's blog is hands down my favorite website about early childhood and inspired play, and it was Allie who first introduced me to the Theory of Loose Parts, which got me exploring with my own children.
"The Theory of Loose Parts Play" was proposed by Simon Nicholson back in the 1970's. His theory is this: "In any environment, both the degree of inventiveness and creativity, and the possibility of discovery, are directly proportional to the number and kind of variables in it."
When I started thinking about adapting Loose Parts Play inside my home, there were a few things to rethink. First of all when Nicholson speaks about number and kind of variables, I think he ultimately takes his inspiration from one place, and one place only; the truly wild outdoors. Outside loose parts can fall from the sky, be dug from the ground, plucked from a branch, or drop from a bird's wing. The sounds, textures, and smells are all ever-changing and we could never, ever recreate such an amazing sensory experience inside a house, even with dump trucks of glitter.
I had to watch my daughters play a lot to better understand how I could compete with mother nature and increase the number of "variables" (not necessarily the amount of stuff) within our home play environment. Over time, I noticed three categories of objects emerge that they "needed" to make their play more cohesive:
Loose Parts: hand-held objects that assume imagined identities through play.
Containers: objects used by my daughters for collecting, sorting and transporting loose parts as well as defining small spaces.
Expandable Parts: objects used by my daughters to construct and define large spaces
Now, whenever my daughters engage in loose-parts-style play, I try to make sure that all of these elements are available to them. When they are absent, tragic things have happened. Entire shelves of puzzles have been mined for loose parts, fabric and sewing notions have gone missing and Loose Parts Play has ravaged my home like a wildfire, consuming hours of my time in little loose parts cleanup. Although these ideas are only my own expansion on someone else's theory, so far they have proven true for our sample size of two. I'm curious to hear about your observations. What drives the loose parts engine in your home or classroom?
Enjoy our family recipe for Loose Parts Play (indoors):
(Substitute as necessary)
Loose Parts wooden blocks, plastic construction blocks, plastic bottle caps, acorns, shells, stones, cardboard tubes, clothespins, handkerchiefs, fabric scraps, stones, coins
+
Containers
Sorting Totem Boxes, egg cartons, cardboard fruit trays, graduated boxes
Transporting small paper bags, child sized buckets, baskets, boxes
Collecting nesting eggs (wooden or plastic), Matryoshka dolls, jewelry boxes, matchboxes, small recycled plastic jars, small tins with lids
+
Expandable Parts
Textiles large scarves, large fabric pieces, tissue paper, newspaper, softened Kraft paper, child-sized carpets or rugs, blankets
“Fences” cushions, interlocking cardboard pieces, over-sized lightweight blocks, Hula Hoops, jump ropes, long, lightweight cardboard tubes, fold-up cardboard screens

(mug by my college buddy Jeremy http://www.oguskyceramics.com/shop) We're planning a little adventure for Father's Day....something involving a bike ride and a picnic I think? I saw this idea in a book called, "Japanese-style Interior of Living" that I checked out from the library. I thought it was a sweet alternative to a card.
What's your plan for Father's Day? Are you going on an adventure?


