box

Cardboard Costume Challenge Results

[slideshow_deploy id=2839] (Notes: Because all of the costumes were essentially made of cardboard elements mixed with other media, I eliminated the "hybrid" category. There were no bicycle costume entries.)

Adults:

Edward Westerhuis: I am the Ram! Cardboardia: Cardboard Jack-o-lantern (Special Mention) Leelada via Flickr: Cardboard Cowboys

Kids:

wrnking via Flickr: Cardboard Knight Rachel and Tom Morgan: Archery Knight

Kid Made:

Leo: Teenage Mutant Ninja Turtle Sid: Star Wars Storm Trooper (Special Mention) Lego Block


You all have me pondering the many new ideas you put out there with your incredible costumes! I'm thinking about metallic cardboard, felt on cardboard, fringed cardboard, cardboard horns, and wearable cardboard houses and cars.

So much inspiration! I hope you feel the same way! The level of creativity that turned out for the challenge was so overwhelming, I hope everyone feels a great sense of accomplishment from the costumes they created. Tomorrow I'll be posting some reflections about the challenge and welcome your suggestions for next year.

Deep bows to all our judges and to MakeDo Japan for donating MakeDo kits to all the winners of the contest!

Our Cardboard Swiss Cheese Chalet

A new watermelon box creation!  A hideout for my two little pipsqueaks.

This little place was a lot of fun to build, and I love the idea of a hideout that's triangular in shape.  I spent about 2 days working on this project off and on, because I had to take breaks when my arm got tired of sawing through all that cardboard.

The watermelon box I started with already had lots of holes in it, so I enlarged some of them to create my  "Swiss cheese matrix" on all three sides.

I started by figuring out the rough dimensions of the little fort by folding the box in different places until I found what worked best for a roomy wedge of cheese.

This box had about eight creased corners, so I cut cardboard strips about 6 inches wide and glued them over the unwanted creased portions so the cardboard wouldn't bend in the places I didn't want it to.

After securing the cardboard and cutting out all the holes from the sides, I put a nut and bolt with a washer in the side to keep everything together and make it easy to disassemble.

Last step was creating a top piece out of lighter cardboard so that the girls could open it easily.

I added a coat of yellow paint, but I think it would be just as nice plain brown.  I also thought  pink washi tape would liven up the holes, but you can see where that's all going to end up.

I'm looking forward to the day when they'll be building their own little cardboard nests... And hey, did I tell you where some of our other watermelon box scraps have ended up?

These came shipped in a cardboard box that we picked up at the local post office.

They're not ours to keep.  We're just babysitting for grandma...

Pop-Up Cardboard Garden

UPDATE: Our first big harvest! That little cucumber grew up!

Electra has had her cardboard garden for over a month and a half now, and seeing that the cardboard is still in great shape after 6 weeks of rain, watering and sunshine, I thought it was OK to officially let it be known that our pop-up cardboard garden is a keeper.

When I was on a cardboard finding expedition at my local grocery store, the produce manager asked me if I was interested in any of the watermelon boxes they had out behind the store. Watermelon boxes, I thought, why didn't I think of that before?

Watermelon boxes are made of triple-walled cardboard with a slight waxy finish, and they are super sturdy, even when exposed to rain. This garden isn't intended to last for more than a summer season, but the cardboard should easily last that long. After we finish picking our tomatoes the plan is to distribute the soil onto the other needy beds in our front yard,  and pack up our watermelon box for curbside recycling.

I used a serrated bread knife that I got from a nearby thrift shop to cut the box down to 12.5" high. Then I just positioned the box in a bright and sunny area of our front yard.

My husband kindly screened several wheelbarrow loads of compost from our backyard and added it to the garden. The last step was cutting off the little triangles of cardboard on the sides that center the watermelon box onto pallets for shipping.

We decided this would be the perfect first garden for Electra so I let her pick out all of her own plants at the local greenhouse. I encouraged her to choose a variety of vegetables, flowers and herbs. She chose cucumbers, tomatoes, chives, basil, cilantro, rosemary, zinnias and her favorite, geraniums.

She LOVED handling and smelling her plants and breaking up their roots to get them ready for planting.

Here she is watering the new crop, and facing a few skeptic neighbors who were sure we were preparing for failure.

We watered the garden as needed trying to let it dry out as much as possible to encourage deep root growth and preserve the box. I notice after one month of watering the box is starting to break down a little where the bottom  seam is touching the soil. It looks like it's not to much of a problem at this point, so I'm leaving well enough alone.

After a big rain the cardboard gets a little damp and softens. It will harden up as it dries out, so try not to disturb the cardboard too much when it's wet. I'm not promising invincibility here folks, but this IS a means of getting a few more cherry tomatoes into your little ones hands, and a great way to kindle a budding love of gardening.

Isn't this tiny cucumber the cutest thing you've ever seen? Seeing it all nestled up next to the side of the triple wall cardboard just about breaks my heart.

Stackable Cardboard Puzzle Trays

Getting our toys organized to the point that they can easily be used and put away has been a huge focus in our home this past month.

Electra is a complete puzzle nut, so I thought getting our puzzles straightened up would be a good place to start.

These are just kiwi boxes, super sturdy ones, that I rescued from the grocery store. I cut out the front portion of the box with a utility knife.

The boxes have notches at the top that interlock with the box above. This feature makes the boxes great for stacking since they always stay in place.

In the first version I tried, I removed the entire front of the box, which I wouldn't advise. It's important to leave at least an inch or so on all three sides to maintain the rigidity of the cardboard.

We thought about decorating the boxes in some way, but I in the end I fell in love with the punchy red and yellow (and the little diagonal break.)  Bold, graphic colors are such a great contrast to all of the neutral shades we have in our apartment.

I'm a big proponent of Montessori philosophy. "Help me do it by myself," is a central Montessori theme, and this project is an example of one way that we integrate Montessori  philosophy into our day-to-day activities.

Electra always works on a mat to define the space, and chooses one puzzle at a time. When she's done she has to put one puzzle away before she gets  another one out.

Sometimes I pull all of the trays out for her to choose from and sometimes just a few, it kind of depends on the mood of the day and what she's currently interested in.

I have to say, with this system, she really does clean up after herself. There's something about that whole order begets order thing.

Now if I can just get it to spread to the rest of my house a little faster.

More on Montessori:

Basics of Montessori Philosophy

Montessori: The Science Behind the Genius, by Angelina S. Lillard, PhD (If you don't have time to read this excellent book, listen to the NPR podcast while you're folding laundry!)

Giant Cardboard Cubes and the Adjacent Possible

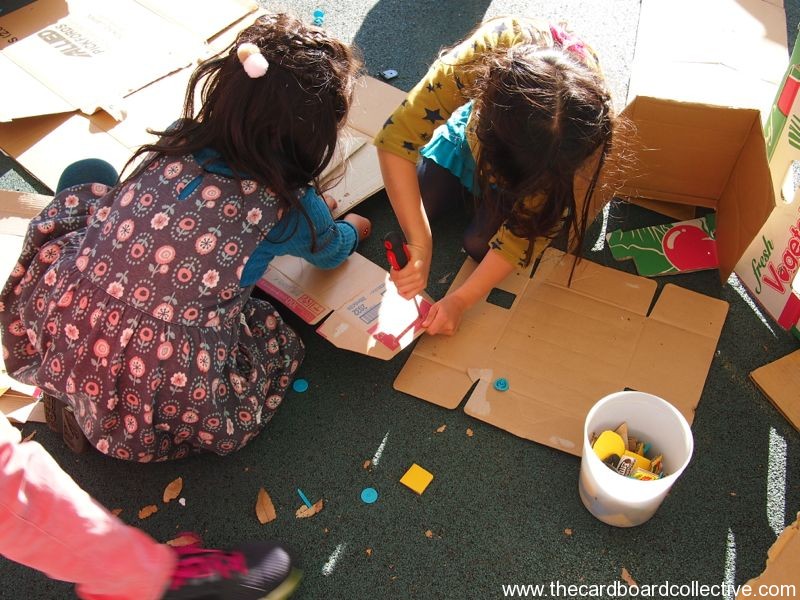
In the spirit of modeling creativity and inspiring play, I wanted to share with you a little bit about some of the "play" that I engage in here in my cardboard lab/home.

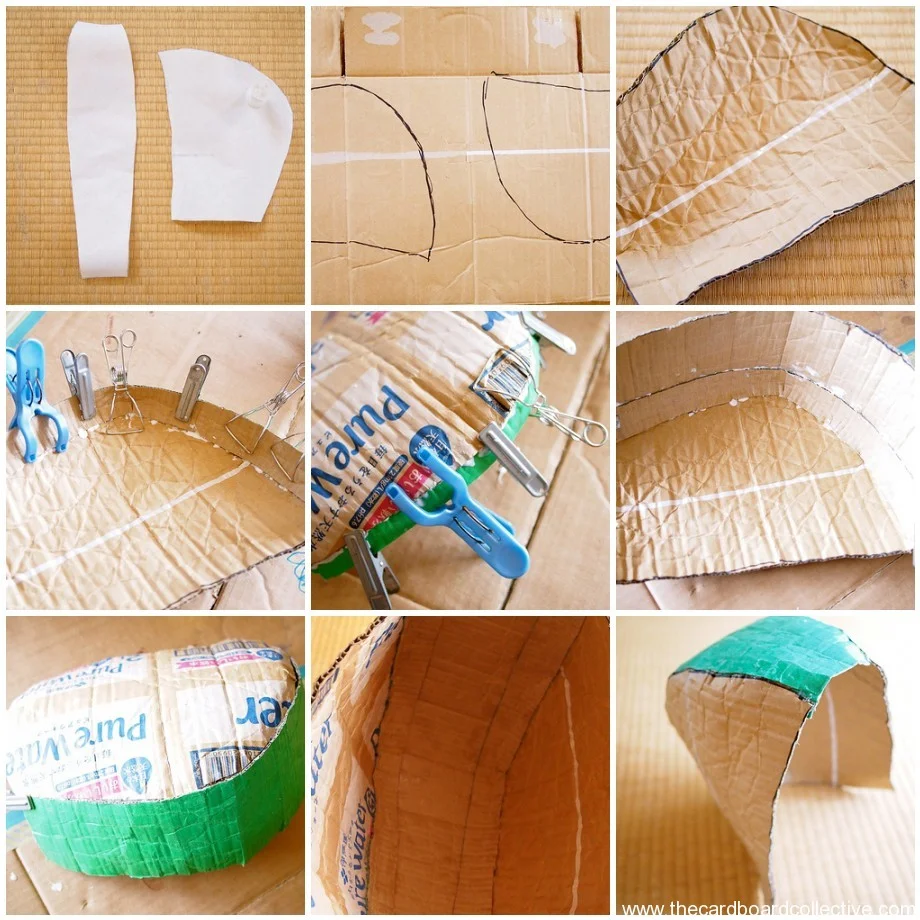
I made these giant cardboard cubes after spending an hour or so playing with a stack of cardboard banana boxes that I had collected.

Each cube is made from the tops and bottoms of two banana boxes and two cam straps.

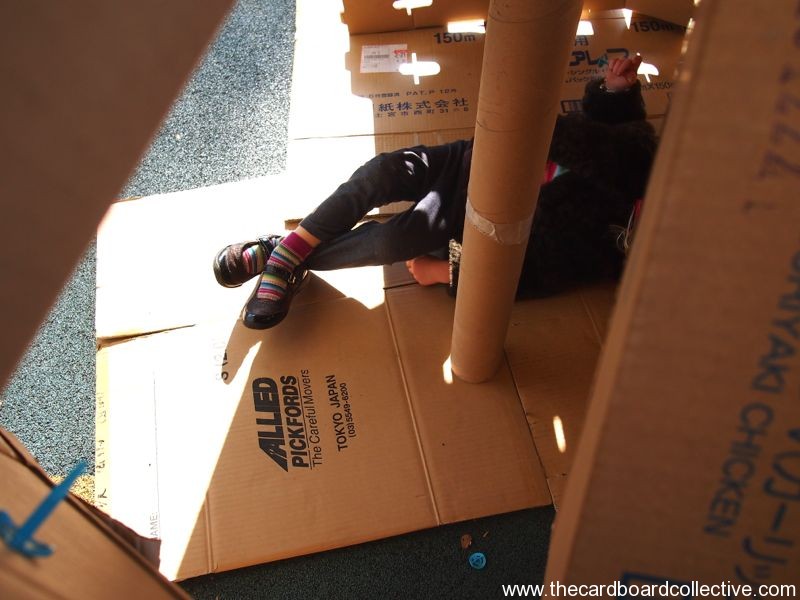
Remember this stage in your kids? Everything down the rabbit hole...

We discovered that the cube has these pockets that are the perfect place for Isis to keep her favorite board books. (We have to keep our other books out of reach for now, otherwise we would spend all of our days re-shelving books instead of reading them.)

Last year I read the book, "Where Good Ideas Come From", by Steven Johnson and started thinking about how I could become more innovative in my day-to-day life.

In Where Good Ideas Come From, Johnson talks about an idea called "the adjacent possible." The concept goes something like this:  We seldom have fully formed ideas or creative solutions that come to us in a moment of brilliance. These ideas build up as slow hunches that we compile over time.

So in effect, it's all the little experiences that lead us to those  genius ideas.

I imagine these adjacent experiences as stepping-stones. You can't get to that big idea, without first leaping from little idea to little idea.

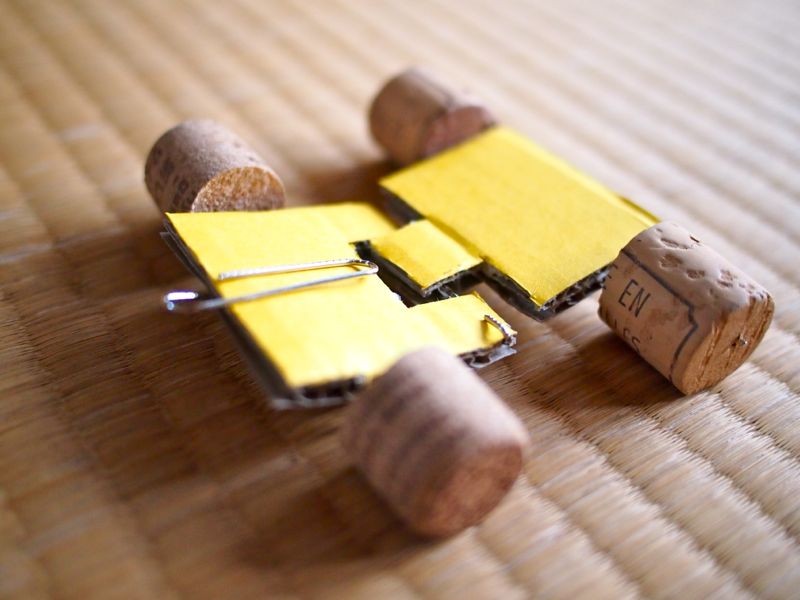
I'm trying to spend more time stepping away from the computer and actually playing and experimenting with cardboard as my way of building a path towards new ideas and designs in cardboard.

Future Parkour enthusiast?

I have to say, it's a lot of fun.

I get so much joy out of just playing with cardboard, with no obvious intent, just for the joy of it. Sometimes it comes of nothing, and sometimes you get giant cardboard cubes; a happy accident.

As Steven Johnson says, "Chance favors the connected mind."......

So now I invite you to comment!

What materials do you like to play and experiment with as an adult? Fabric, wood, flour, clay, fiber, dye, paper?

What machines do you work on and repair? bikes, sewing machine, cars, cameras, computers? (This year I replaced the hard drive on this very iMac that I write the blog on. Talk about empowering! You have to check out iFixit.com.)

Do you let yourself drift off into that elementary school aged daze, where nothing mattered beyond the sandbox or your paper and paste pot?

Cardboard Box with Wheels goes to the Airport!

Yes, it's true. We ditched our stroller for a cardboard box with castor wheels, and it was awesome!

Where to start?

A few weeks before our flight, I was puzzling through the logistics of moving a toddler and a three-year old through the airport with all of our accompanying accoutrements. Both at Tokyo Narita and Detroit Metro, I knew we had some distances to cover between gates, check-in, immigration and the rest. I hate strollers and started thinking of ways I could avoid taking ours through the airport.

That's when I started playing the what if game with myself.

What if we pulled the girls through the airport in the box with castor wheels? Or they pulled each other? Wait, I think our carry-ons would both fit in the box if we wanted to carry the girls or let them walk instead... yes, they do....Oh and wait a minute.. the box fits the dimensions for a carry on.. perfectly.... And hey, I think this could be genius!

I tucked a shear-ling sheepskin into the box for the girls to sit on in the airplane. It made a very soft and comfortable lining for them when they were sitting in the box at the airport.

Taking the Box with Wheels through the airport was even better than I imagined. When we initially walked into the airport towing the box with the girls behind it everyone around us actually just stopped and stared.

They had huge smiles on their faces and there was a lot of pointing and giggling (in a good way). A few people came up and asked us if they could take pictures, and we laughed and willfully obliged.

It felt a lot like we were pulling our own mini Fourth of July parade float through the terminal.

Still going strong even with all the bags AND kids in tow.

Surprised to find out they're trying to curb hamster trafficking at Tokyo Narita Airport?

Isis befriended EVERYONE at the airport. No luck getting a business class upgrade though.

Where should we take our box next?

The Wheels on the Box

Just add Wheels... During our last trip to 0123 Harappa the girls really enjoyed the cardboard box sleds that they had. I kept thinking about how we could make an adaptation using castor wheels and some hardware from the local DIY home store. The real discovery however proved to be the strength and durability of a certain breed of fruit and vegetable boxes.

Dad's old necktie makes a great and easy pull strap. Just thread it through the holes and tie a square knot.

By the way, we've been putting castor wheels on everything in our house.

Utilizing our cardboard hitch, Electra starts up her own tricycle transport for babies business. (Kitchen to tatami room connections offered daily.)

Besides the scary warning akin to those found underneath your mattress, I found out that this box is built to hold up to 55 kilos!! It also has a water-resistant and wipe-able waxy finish (mothers rejoice!) which I believe must help combat mold and mildew during transport of fruits and veggies.

Scour your local grocery store for one of these sturdy boxes. I'm sure your friends in the produce department would be happy to help you out!

I found the castor wheels for about $ 0.99 a piece and then looked for nuts and bolts to fit the castor wheels. The bolts are about 2 cm in length. Just enough to accommodate the castor wheels and the single walled box.

Using a leather punch, (but you could also use a small Phillips head screwdriver) I punched holes in the bottom of the box that corresponded with the holes on the bottom of the castor wheels.

I found out after a few days of play and finding lost nuts all over the place, that you should orient the bolts so that the nuts are attached on the inside of the box. (OK stop giggling!)

I cut an extra piece of cardboard to act as a liner and provide a little more strength and rigidity to the bottom of the box. It also provides some protection from the bolts sticking up when the girls are riding inside.

Of course don't forget to decorate the box to look like your favorite fire truck, school bus or train car. (We haven't gotten that far yet.)

A cardboard box with wheels is a wagon, a trailer, a wheelbarrow, a hangout spot, and all around super fun toddler toy.

Yay cardboard!